Chat integration with tawk.to
- name:
- Chat integration with tawk.to
- description:
- Integration of the tawk.to chat in iTop (both backoffice & portal)
- version:
- 1.1.1
- release:
- 2022-11-23
- itop-version-min:
- 2.7.0
- code:
- combodo-tawk-integration
- state:
- stable
- diffusion:
- iTop Hub, ITSM Designer
- php-version-max:
- PHP 8.1
Tawk.to is a free, hosted, third-party, live support chat that can be easily integrated within iTop to offer a new contact channel. It's a perfect way to enable live chat in iTop with a minimal effort/investment.
Revision History
| Version | Release Date | Comments |
|---|---|---|
| 2022-11-17 | 1.1.1 | Fix backoffice user information (fullname / email) not transfered to the tawk.to dashboard |
| 2022-04-12 | 1.1.0 | Enable support agents to create tickets in iTop from tawk.to GUI |
| 2021-11-01 | 1.0.0 | First public version |
| 2021-01-01 | 0.2.0 | First beta version |
Features
-
Add a chat widget within iTop to allow end-users to chat with support agents
-
Allow support agents to create a ticket in iTop directly from their tawk.to chat dashboard
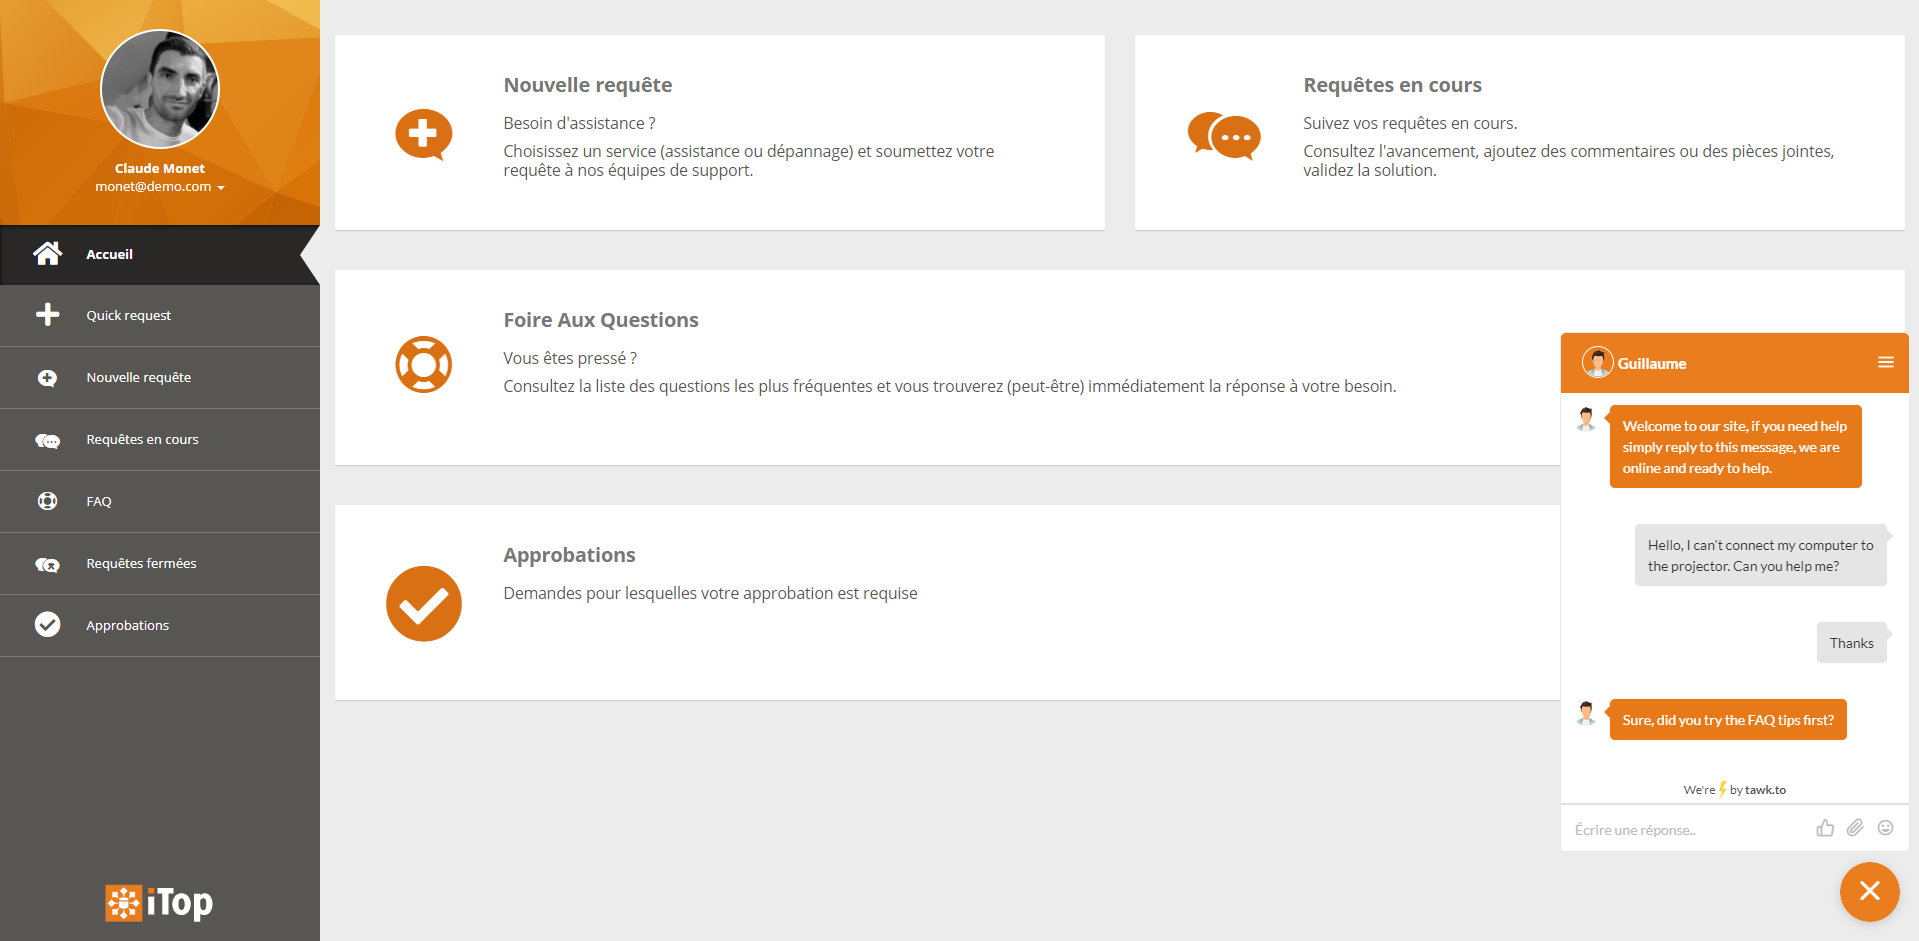
The chat widget appears as a small bubble in the bottom-right corner of the screen. Users can click on it to start a conversation with support agents.
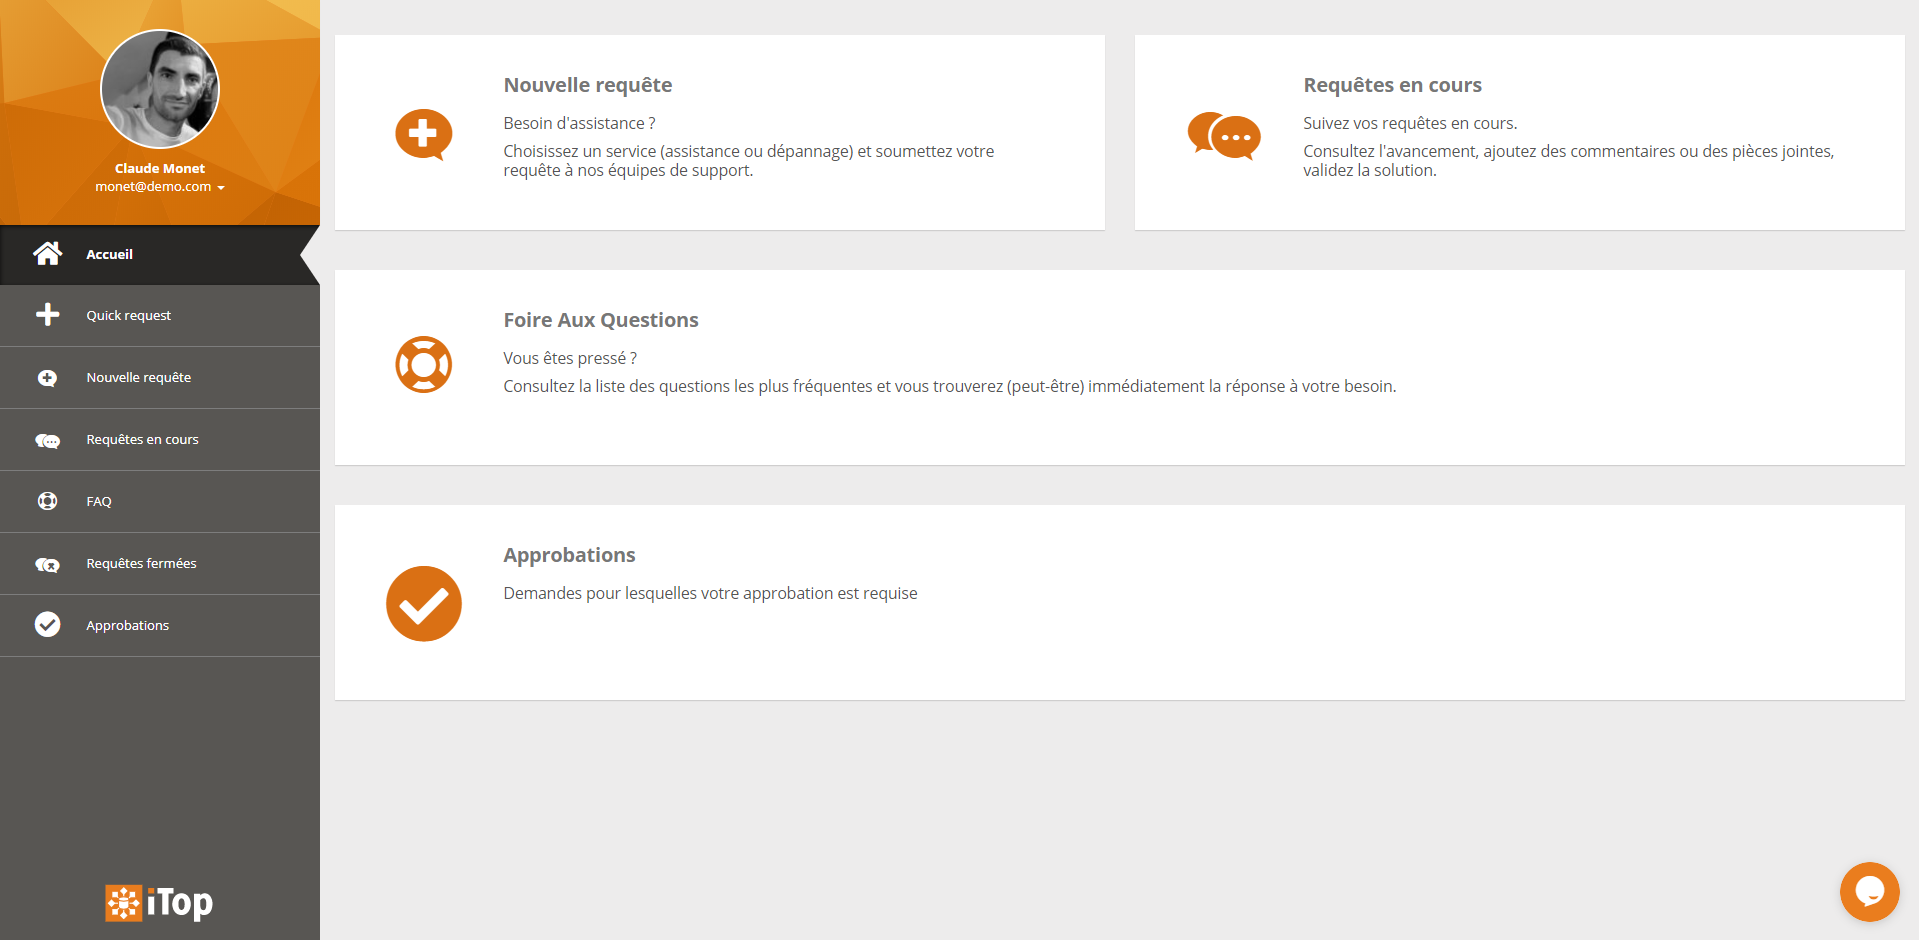
Note that the chat widget can also be enabled in the backoffice.
Support agents can reply through the tawk.to dashboard, and optionally create a corresponding ticket within iTop.
Limitations
-
Unfortunately, embedding the agents dashboard in iTop through an iFrame dashlet is no longer possible as they have shutdown this feature.
-
When creating a ticket in iTop from the chat, the “transcript” of the conversation cannot be retrieved automatically for now due to tawk.to APIs limitations, but support agents can copy/paste it during the ticket creation.
-
Once the ticket is created, there is no further synchronization between the tawk.to and iTop tickets due to tawk.to APIs limitations. Any additional chat messages won't be sent to iTop.
Requirements
iTop 2.7 or newer
Installation
Use the Standard installation process for this extension.
Chat widget
Configuration
Get tawk.to account
Note: This step is only necessary once, if you already did it, skip this step.
Go to tawk.to, create a free account.
Set chat widget configuration
Note: This step is only necessary if you want the chat widget to be visible in iTop. If your chat widget is on another website (eg. online store, corporate website, …) and only want to create tickets in iTop from the chat dashboard, skip this step.
Steps
-
Retrieve Property ID
-
Retrieve Widget ID
-
Fill module configuration
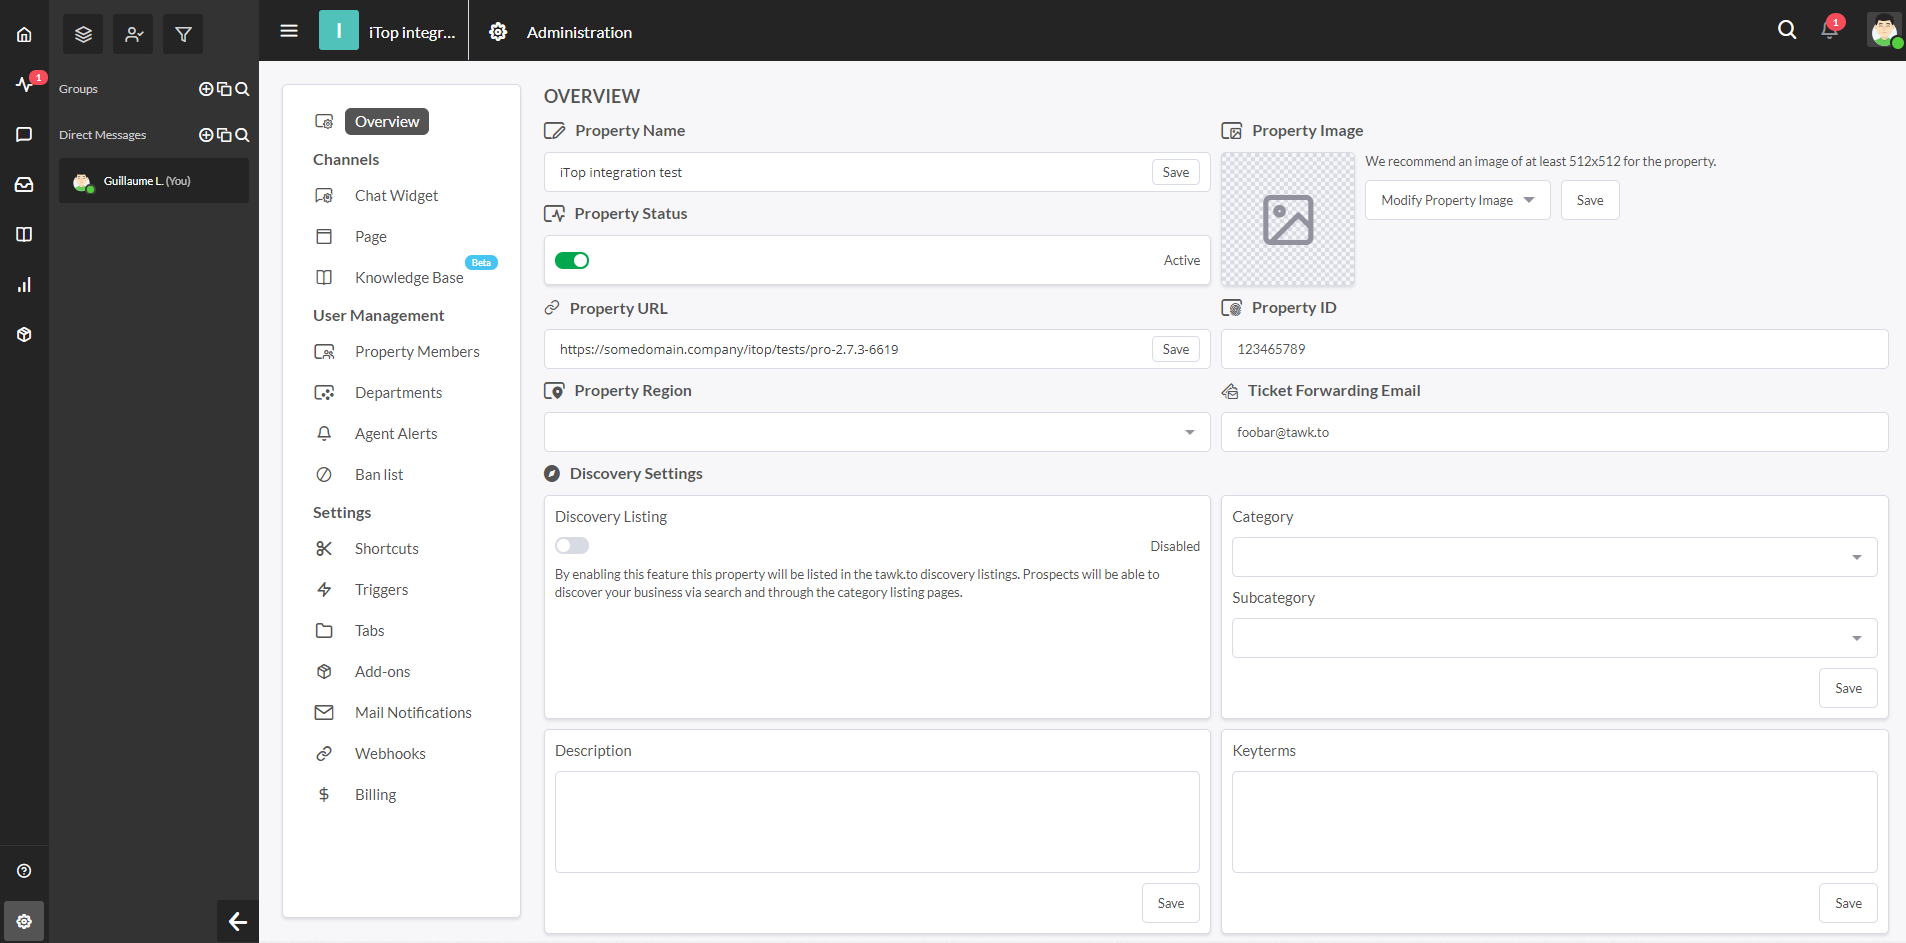
[In tawk.to] First, go to the tawk.to
backoffice, on the “Administration” page, “Overview” tab and
retrieve the Property ID (“123456789” in the
screenshot below) we will use it later.
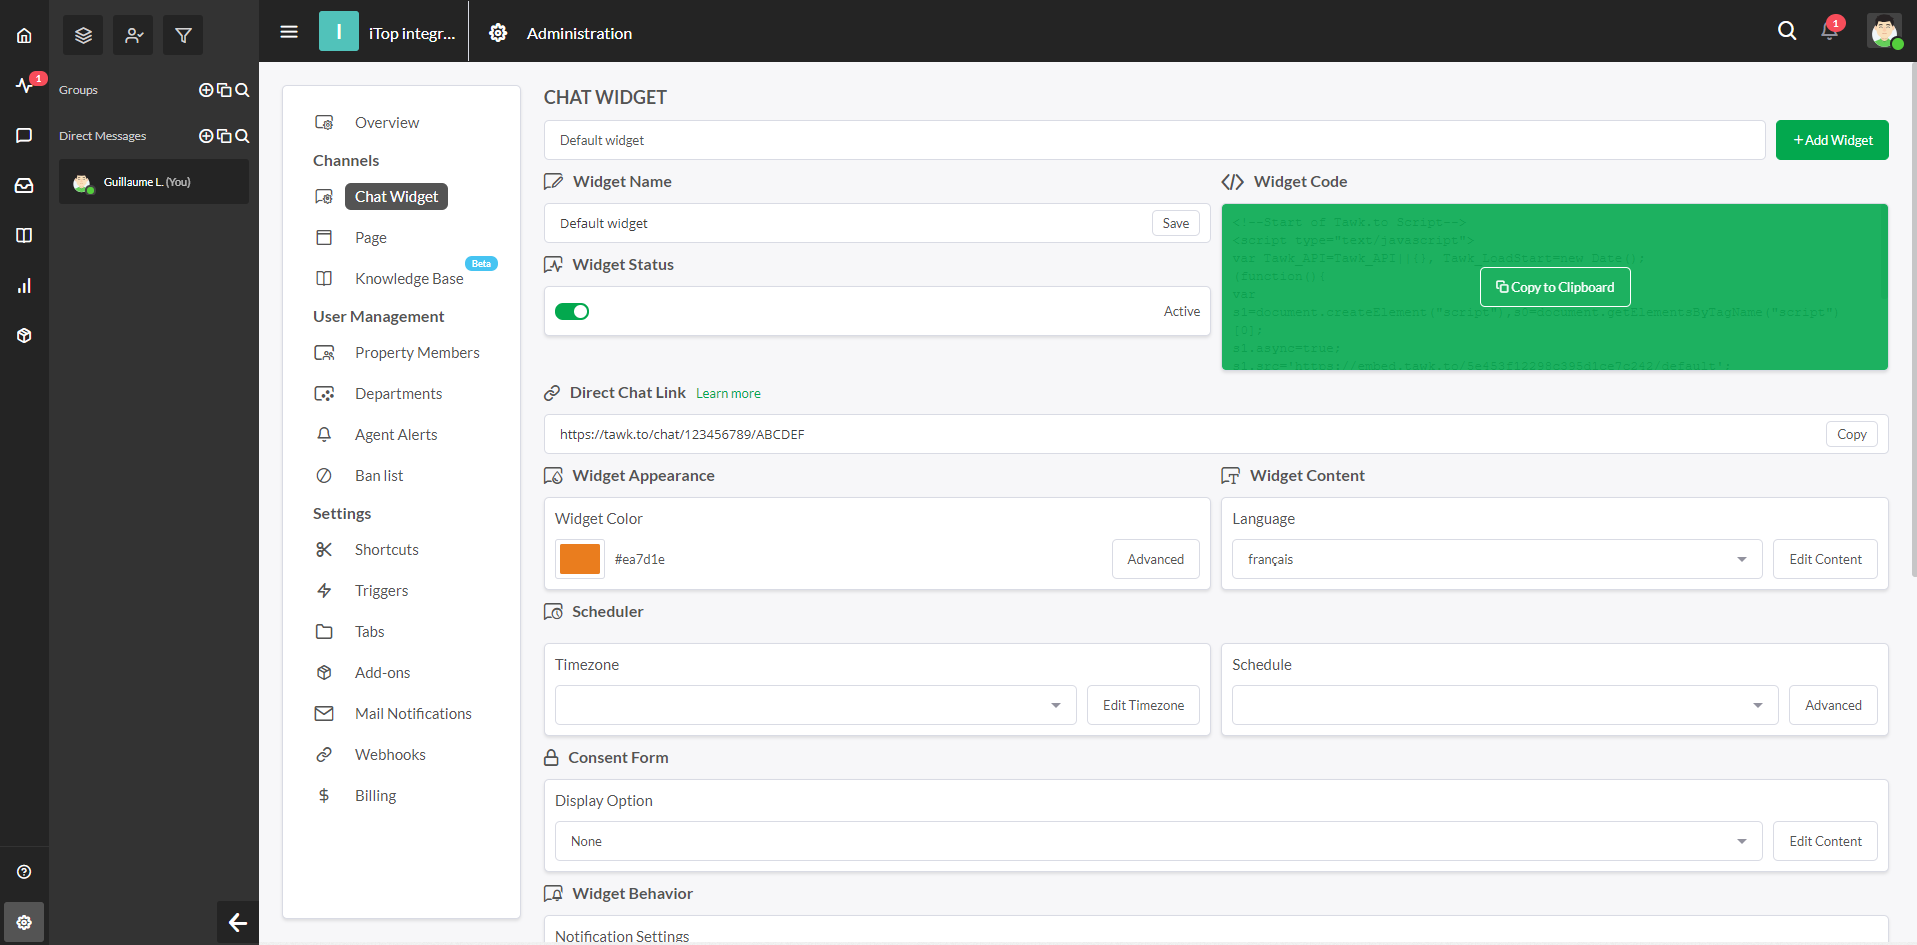
[In tawk.to] Then, go to the “Chat Widget” tab
and retrieve the Widget ID, it's the last part of the
Direct Chat Link (“ABCDEF” in the screenshot
below)
[In iTop] Once you got them, open your iTop and fill the module settings as follow, using one of the methods described below:
-
property_idPut the property ID retrieve in the previous step. -
widget_idPut the widget ID retrieve in the previous step. -
enabled_portalsAn array of the “portals” you want the chat to be enabled on. Can bebackofficefor the administration console or any end-user portal ID (eg.itop-portalfor the standard portal), by default only theitop-portalis enabled. -
allowed_profilesAn array of iTop profiles to define which users will be able to use the chat. If not defined, all users will be able t use it, by default onlyPortal useris allowed.
Important: “Property ID” was once named “Site
ID” on tawk.to, mind to change the site_id parameter
to property_id if you were using an early beta version
of the extension.
There are 2 ways to configure the module settings:
-
Through the iTop configuration file: Will only
-
Through the XML datamodel via the ITSM Designer or an extension
Method 1: Configuration through the iTop configuration file
Pros:
-
Can be done easily as you just need to edit the configuration in your iTop instance
Cons:
-
Only applies to that particular iTop instance. If you are running several iTop frontals or environments, you will need to duplicate the configuration on each instances you want the chat to be enabled.
Simply put the following in the configuration file and fill it with your own settings:
'combodo-tawk-integration' => array (
    'property_id' => 'PUT_YOUR_PROPERTY_ID_HERE',
    'widget_id' => 'PUT_YOUR_WIDGET_ID_HERE',
    'api_key' => 'PUT_YOUR_API_KEY_HERE', // Used only with "secure mode", see section below
    'enabled_portals' => array (
      'itop-portal',
    ),
    'allowed_profiles' => array(
      'Portal user',
    ),
),
Method 2: Configuration through the XML datamodel
Pros:
-
Configuration will apply to all instances using this datamodel:
-
If done in the ITSM Designer: All instances of the concerned license
-
If done in an extension: All instances using the extension
-
-
Can still be overloaded locally with method #1
Cons:
-
When using the ITSM Designer: Need Combodo's assistance to configure the module parameters
-
When using an extension: Need to be familiar with iTop extension development
Use the following XML as a bootstrap:
<?xml version="1.0" encoding="UTF-8"?>
<itop_design xmlns:xsi="http://www.w3.org/2001/XMLSchema-instance" version="1.7">
        <module_parameters>
                <parameters id="combodo-tawk-integration">
                        <property_id _delta="force">PUT_YOUR_PROPERTY_ID_HERE</site_id>
                        <widget_id _delta="force">PUT_YOUR_WIDGET_ID_HERE</widget_id>
                        <api_key _delta="force">PUT_YOUR_API_KEY_HERE</api_key><!-- Used only with "secure mode", see section below -->
                        <enabled_portals type="array">
                                <enabled_portal id="itop-portal" _delta="force">itop-portal</enabled_portal>
                        </enabled_portals>
                        <allowed_profiles type="array">
                                <allowed_profile id="portal-user" _delta="force">Portal user</allowed_profile>
                        </allowed_profiles>
                </parameters>
        </module_parameters>
</itop_design>
Using the secure mode
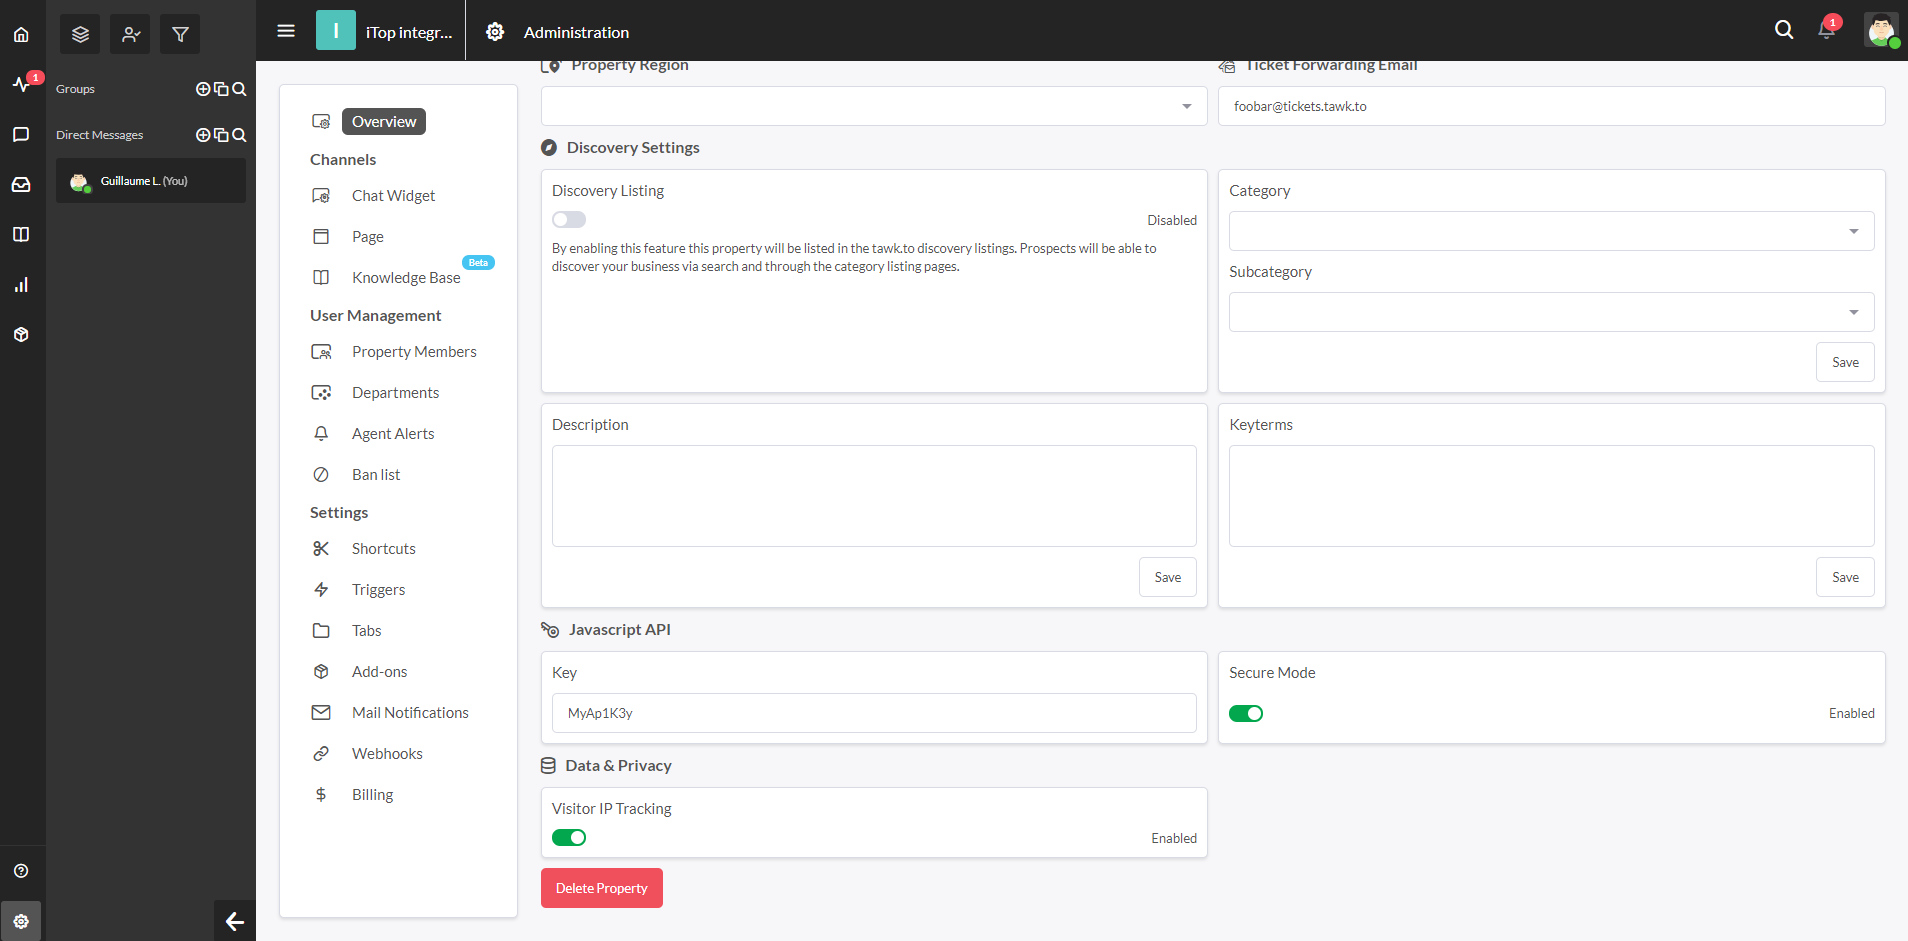
tawk.to provides an optional secure mode to ensure that a user
identify isn't impersonated. If you want to use it, go to their
backoffice in the “Administration” page, “Overview” tab and
activate the “Secure mode”. Then copy the Javascript
API
Key (“MyAp1K3y” in the screenshot below), then put it in the
api_key of the extension settings (see previous
section).
Usage
Once the extension is installed and configured:
-
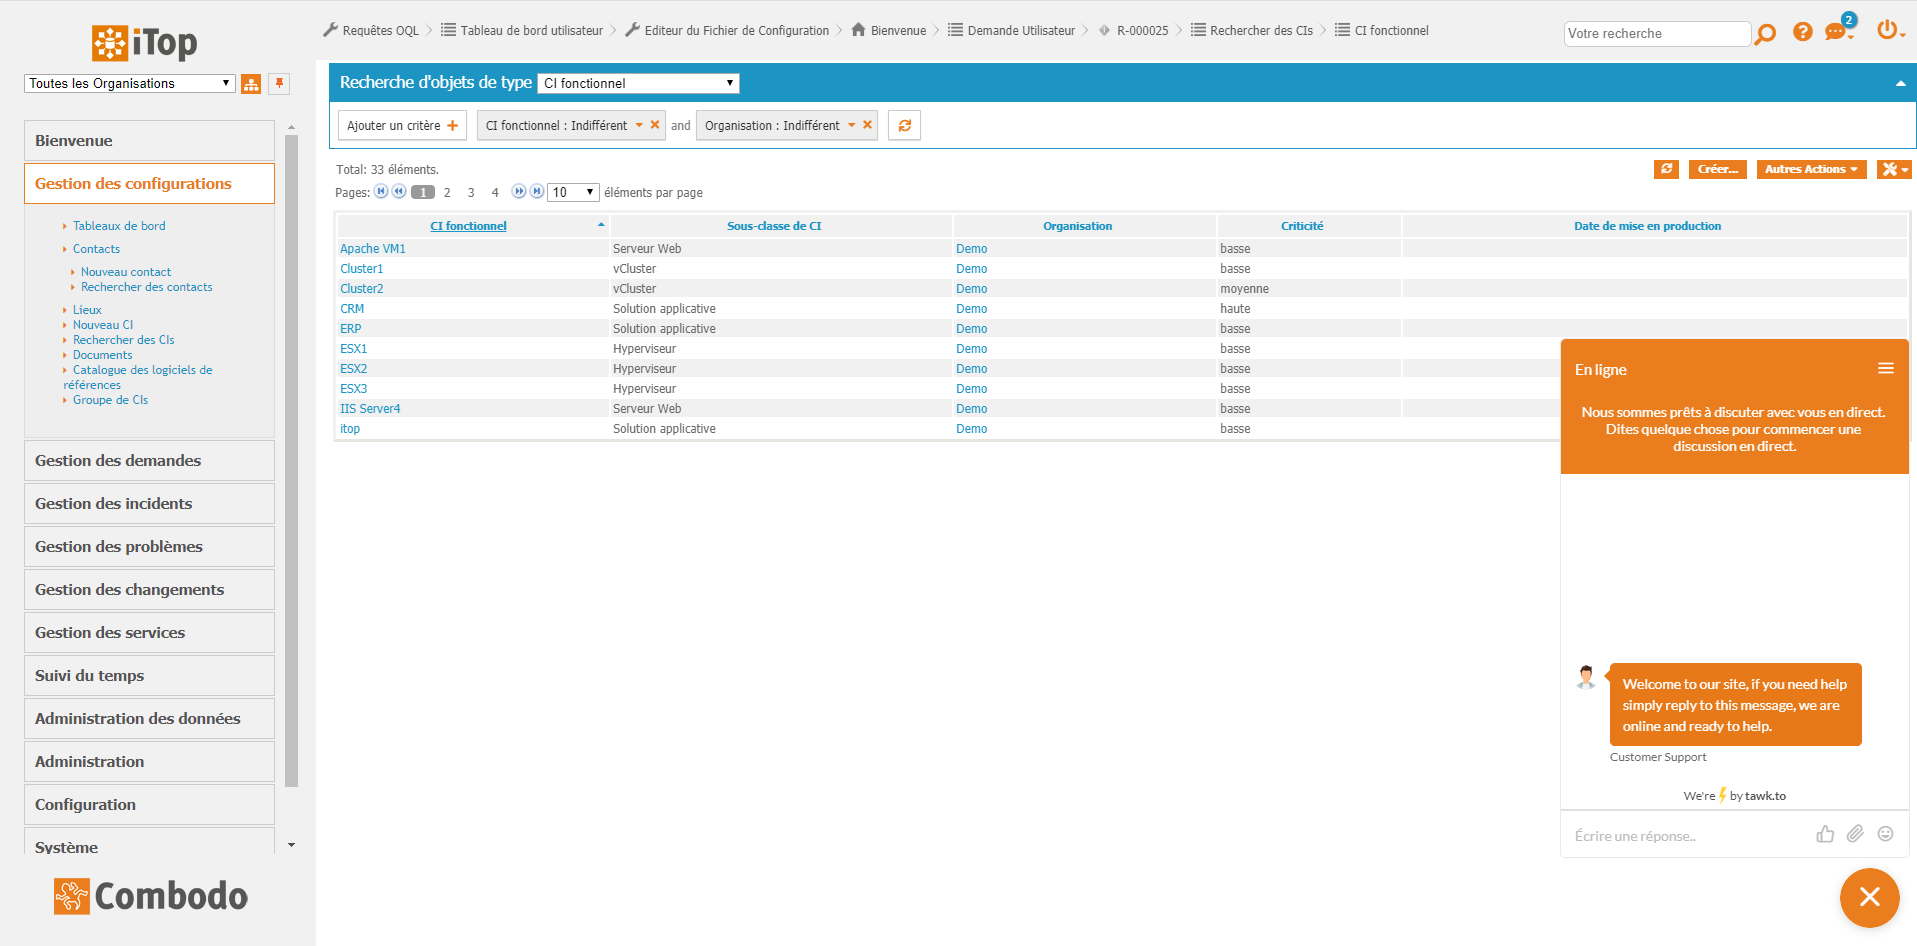
Portal users will be able to open the tawk.to chat widget and start a chat conversation with your support agents.
-
Those agents must have open
tawk.toin a separated tab and answer there. -
If they want to create a ticket from a live conversation, they will have to copy paste manually the discussion from
tawk.tointo an iTop Ticket
For detailled information on how to use
tawk.to, check their web site
Ticket creation
Configuration
Steps
-
Add webhook from tawk.to to iTop
-
Copy secret key
-
Fill module configuration
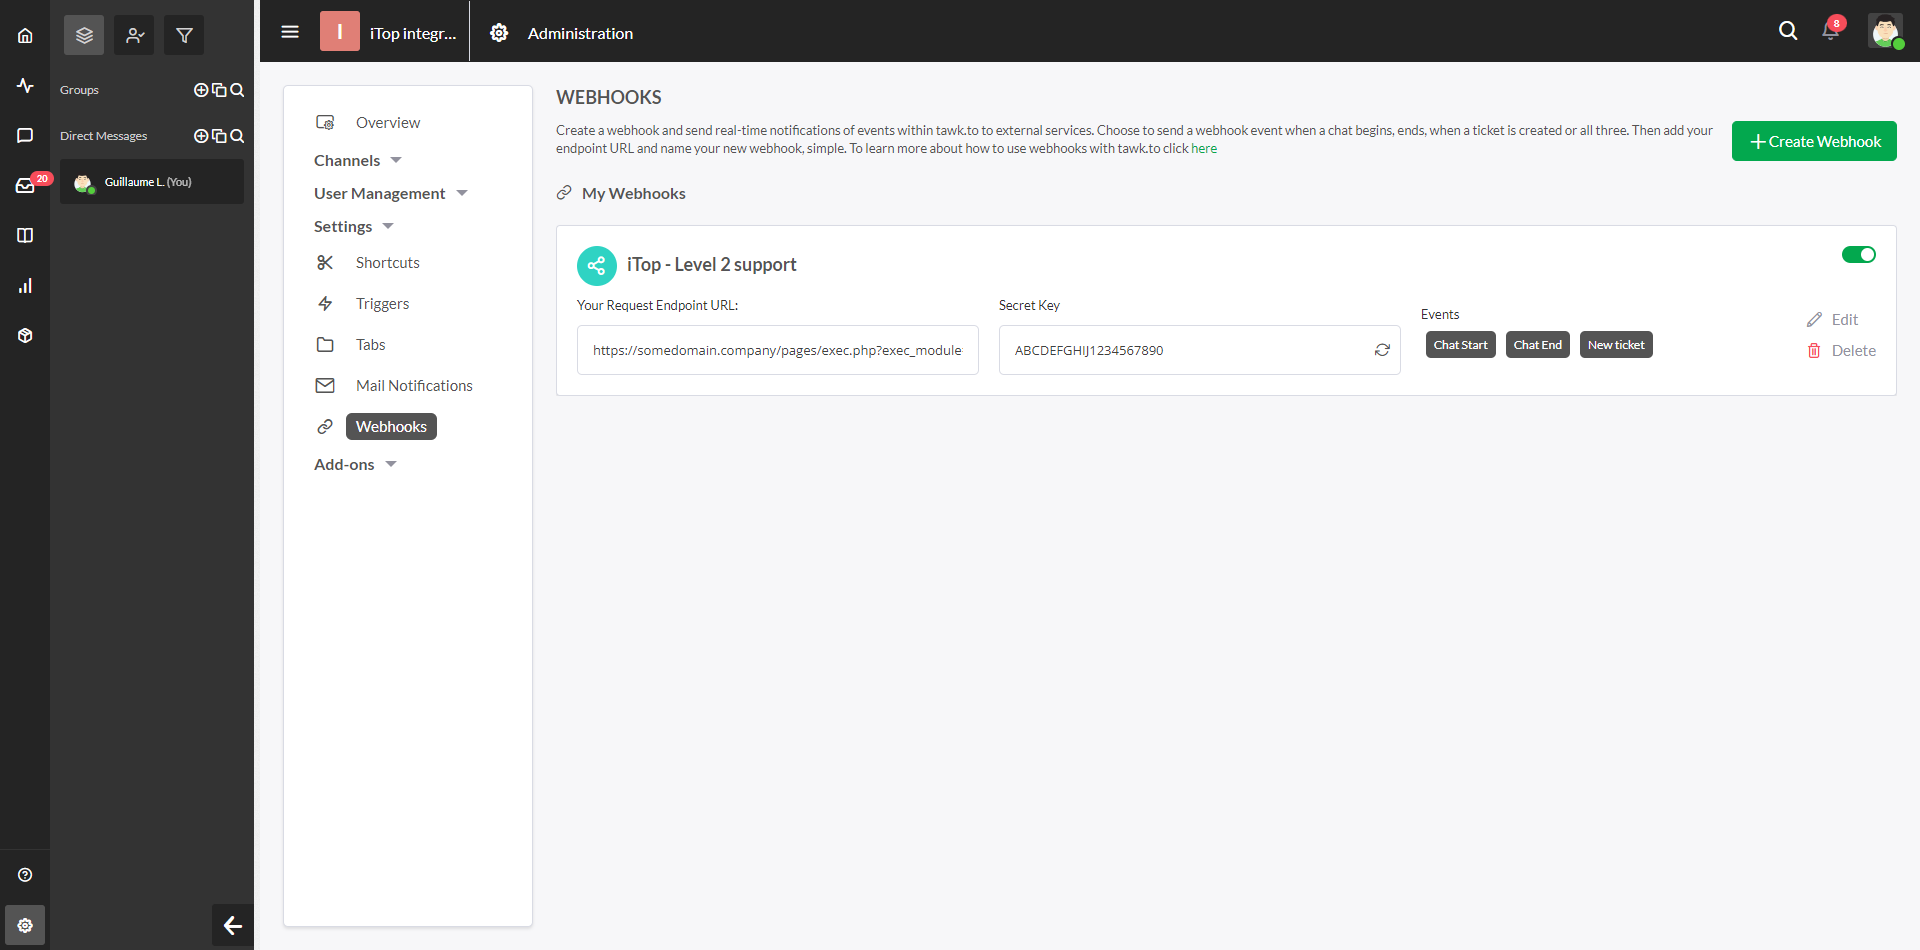
[In tawk.to] First, go to the tawk.to backoffice, on the “Administration” page, “Settings / Webhooks” tab and create a new webhook:
-
Nameis purely informative -
Endpoint URLis the URL of your iTop to call when a ticket is to be created, it must match the following pattern<APP_ROOT_URL>/pages/exec.php?exec_module=combodo-tawk-integration&exec_page=incoming-webhooks.php, so if your iTop is reachable athttps://itop.company.com, the endpoint URL should behttps://itop.company.com/pages/exec.php?exec_module=combodo-tawk-integration&exec_page=incoming-webhooks.php. -
EventsselectNew ticketonly as it is the only event supported for now.
Save then copy the secret key, we will use it
during iTop configuration.
[In iTop] Once you got the secret key, open your iTop and fill the module settings as follow, using one of the methods described below:
-
webhooks.secret_keyPut the secret key copied ealier -
webhooks.create_ticket-
ticket_classPut the datamodel class of the ticket to create (eg.UserRequestorIncident) -
ticket_default_valuesOptionally, default values of the ticket. Can be useful to preset the service or any mandatory attributes
-
ticket_class option MUST have the following attributes
as they will be automatically set during the ticket creation:
org_id, caller_id, origin,
title, description,
tawkto_refMethod 1: Configuration through the iTop configuration file
Simply put the following in the configuration file and fill it with your own settings:
'combodo-tawk-integration' => array (
    'webhooks.secret_key' => 'PUT_YOUR_WEBHOOK_SECRET_KEY_HERE',
    'webhooks.create_ticket' => array (
      'ticket_class' => 'UserRequest',
      'ticket_default_values' => array(
        'service_id' => 1,
        'private_log' => 'Foo bar',
      ),
    ),
),
Method 2: Configuration through the XML datamodel
Use the following XML as a bootstrap:
<?xml version="1.0" encoding="UTF-8"?>
<itop_design xmlns:xsi="http://www.w3.org/2001/XMLSchema-instance" version="1.7">
        <module_parameters>
                <parameters id="combodo-tawk-integration">
                        <webhooks.secret_key _delta="force">PUT_YOUR_WEBHOOKS_SECRET_KEY_HERE</webhooks.secret_key>
                        <webhooks.create_ticket>
                                <ticket_class _delta="force">UserRequest</ticket_class>
                                <ticket_default_values type="hash" _delta="force">
                                        <service_id>1</service_id>
                                        <private_log>Foo bar</private_log>
                                </ticket_default_values>
                        </webhooks.create_ticket>
                </parameters>
        </module_parameters>
</itop_design>
Usage
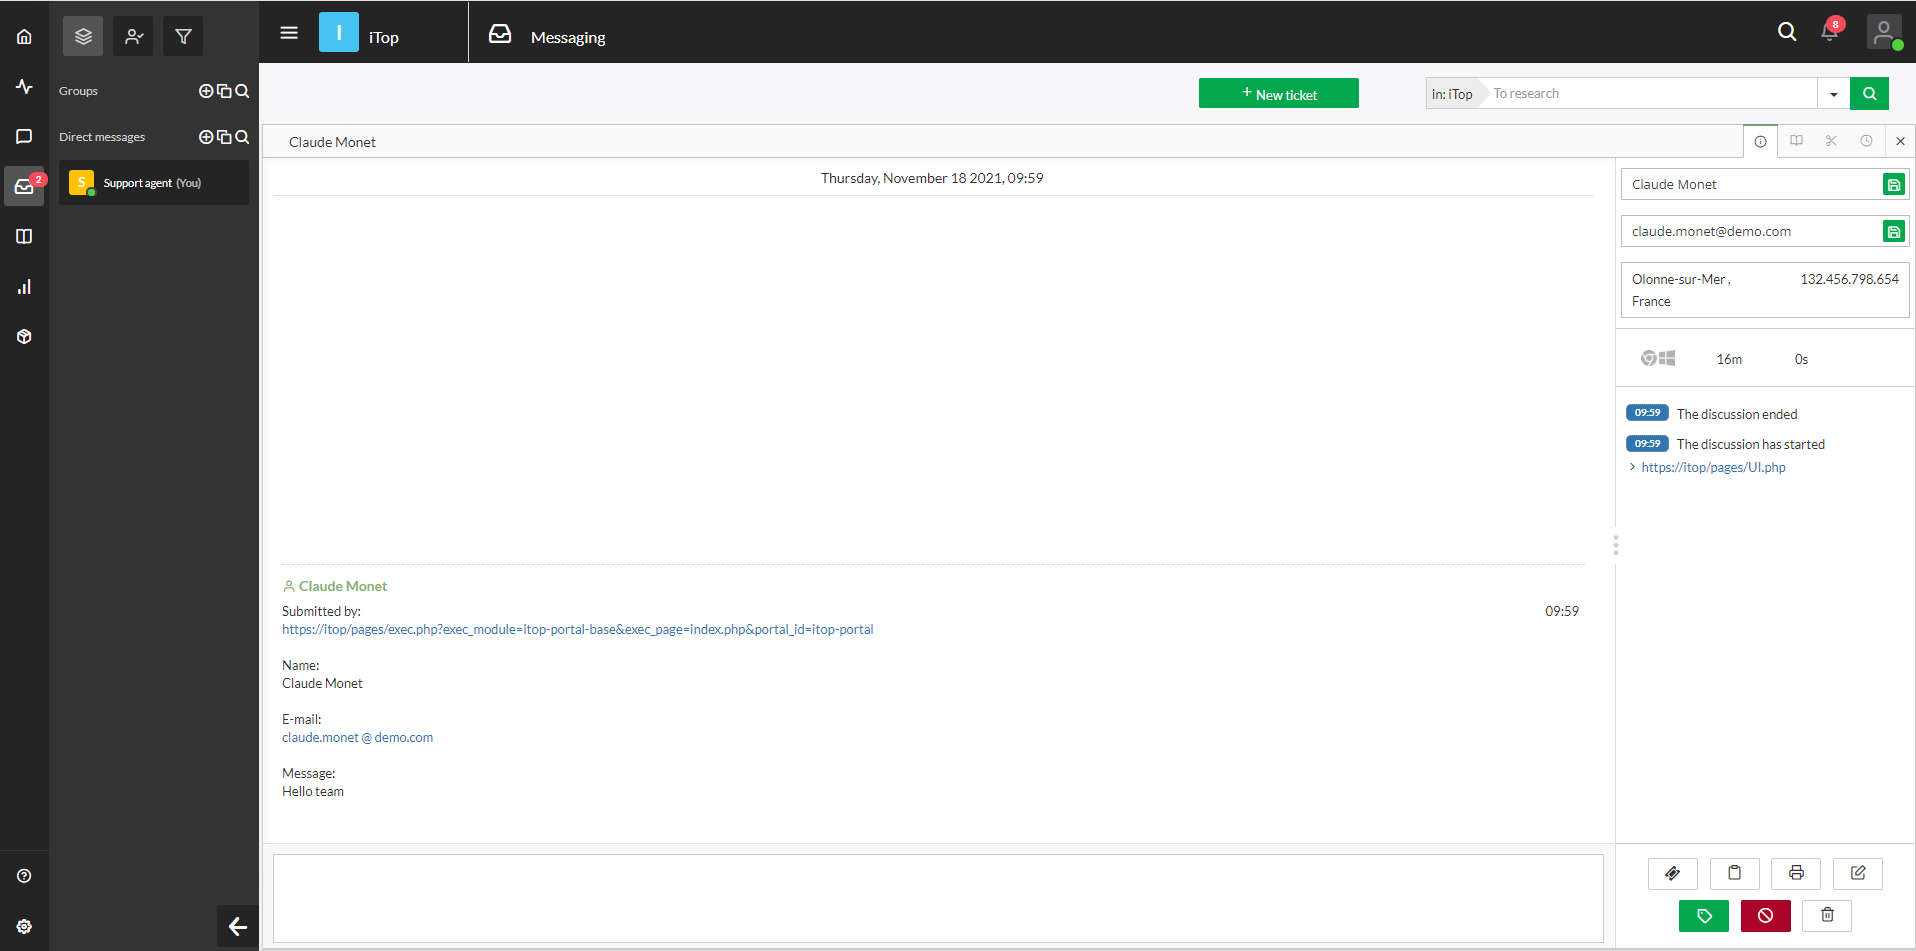
From a conversation with an end-user, a support agent can create
a ticket to the configured iTop, simply click the “Create a ticket”
button. 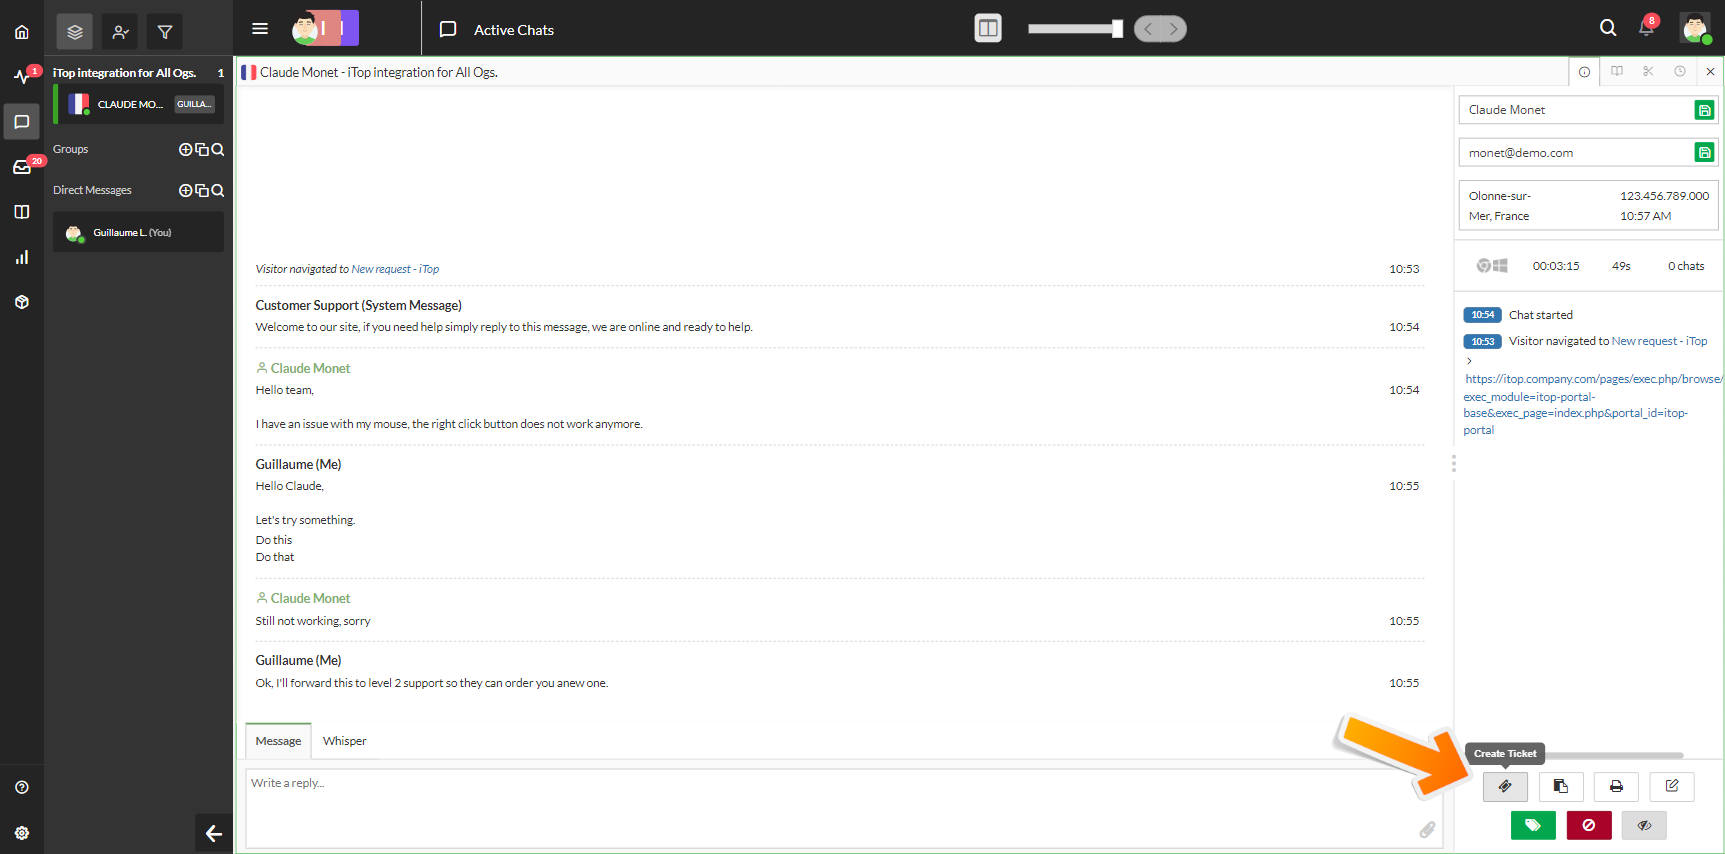
Fill information
-
Recipient nameandRecipient emailwill be used to lookup the corresponding contact and set it as the caller of the ticket. -
Subjectwill be used asTitlefor the ticket. -
Descriptionwill be used asDescriptionfor the ticket. -
Assign to,PriorityandTagswon't be used as they are not transmitted to iTop due to tawk.to APIs limitations.
Also note that the conversation won't be part of the created
ticket, but the support agent can click the “Copy transcript” and
paste it in the Description if necessary. 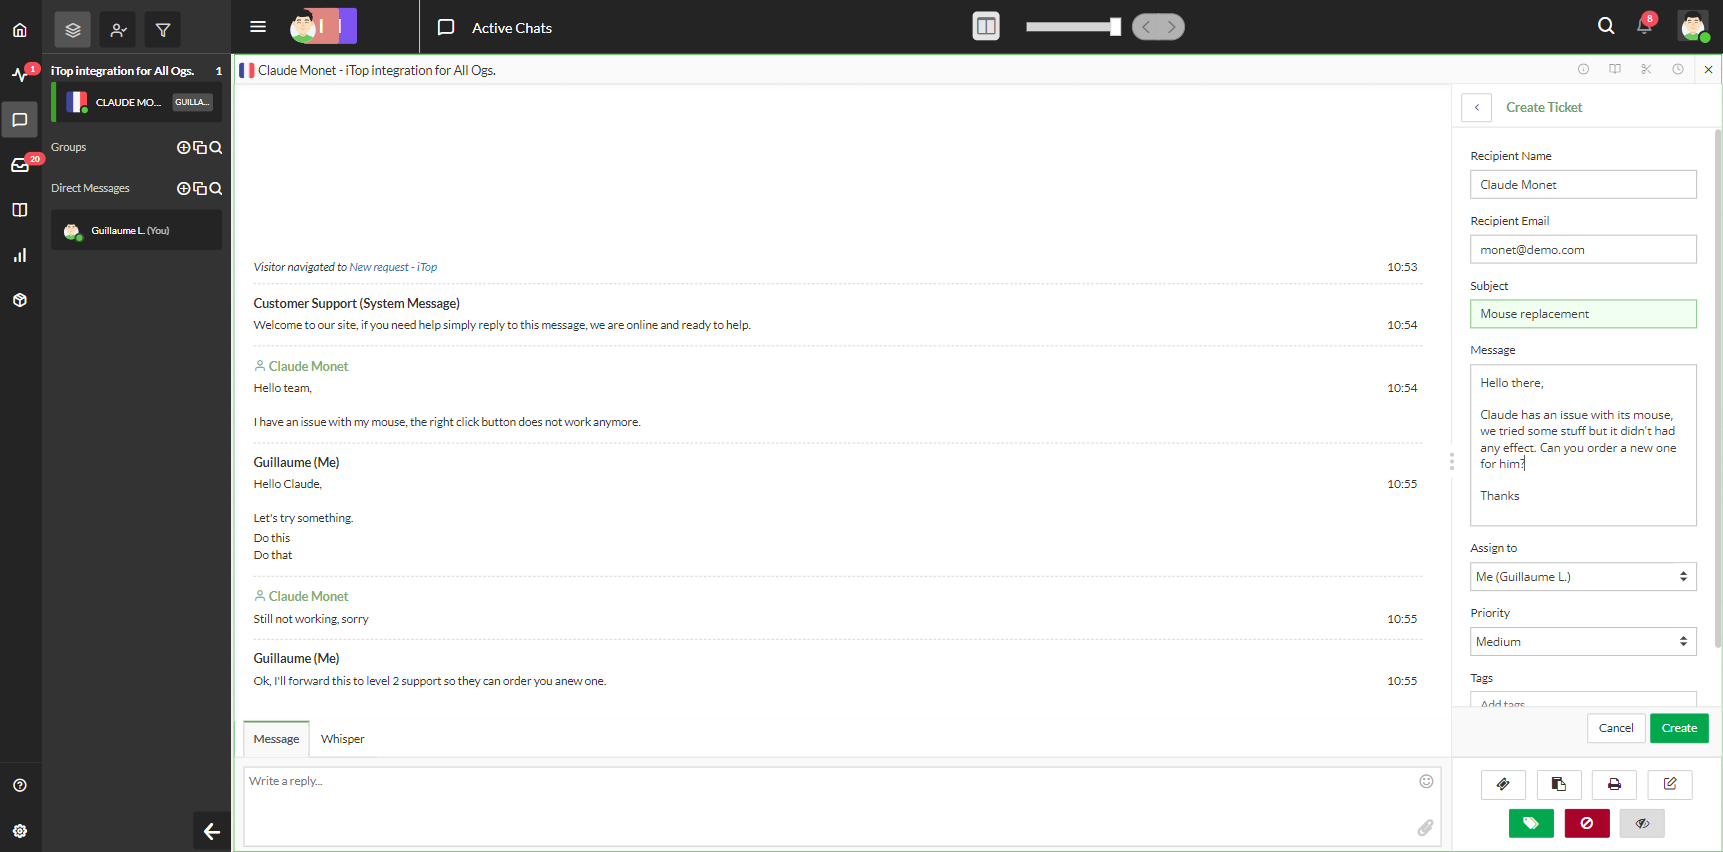
Once ticket is created on the remote iTop, the corresponding
tawk.to ticket's reference is also set in the iTop's ticket for
further / simpler discussions between the support teams. 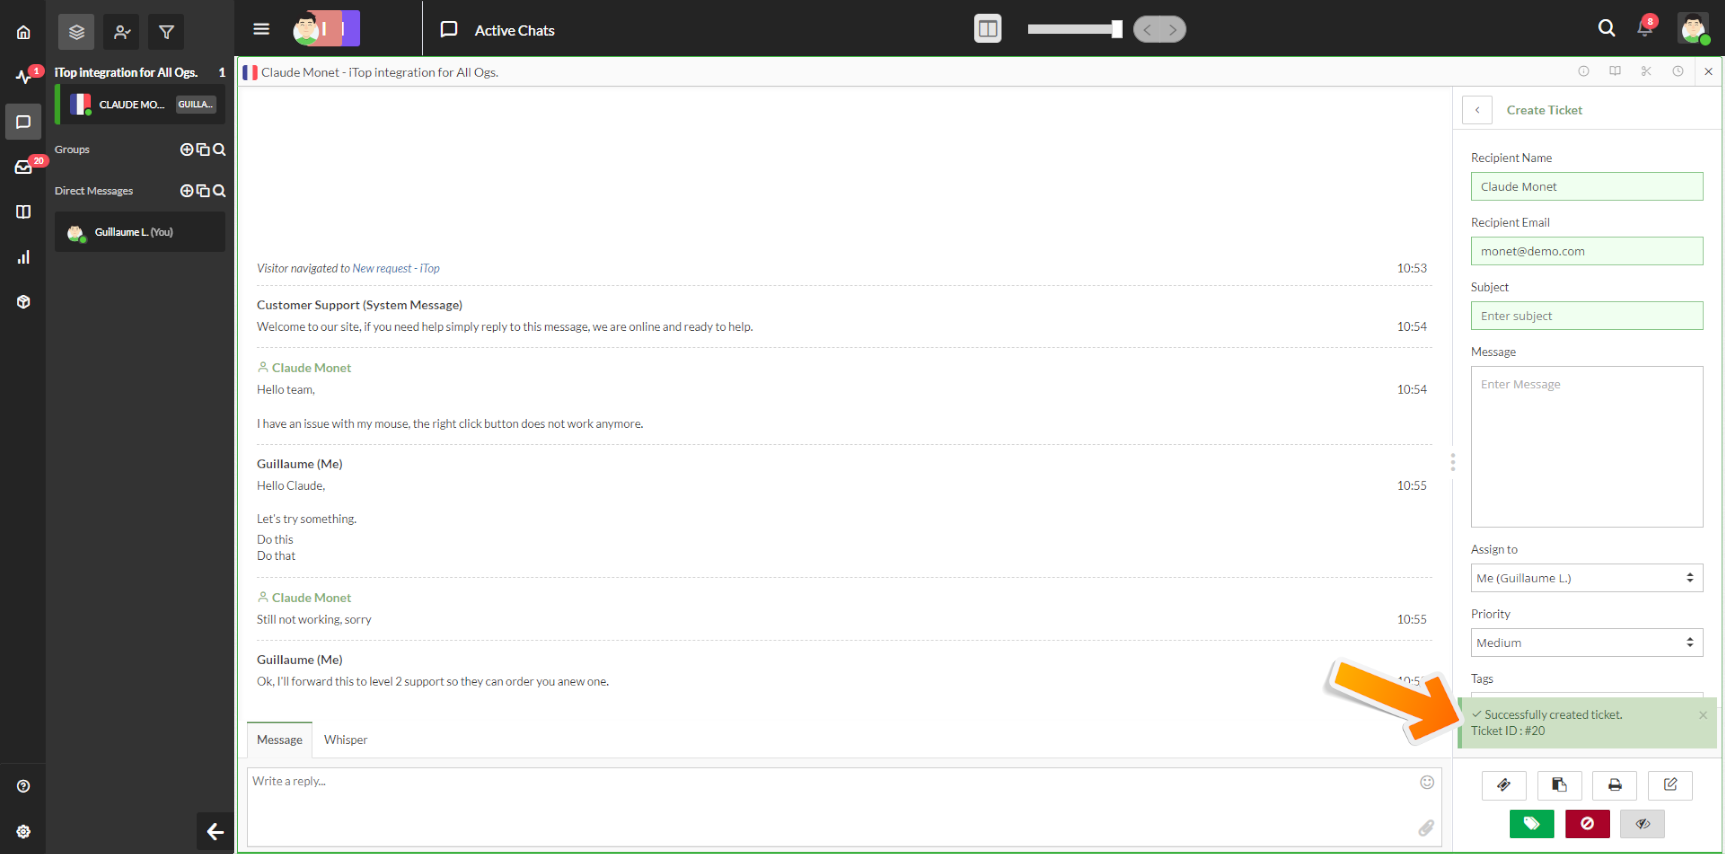
For detailled information on how to use
tawk.to, check their web site
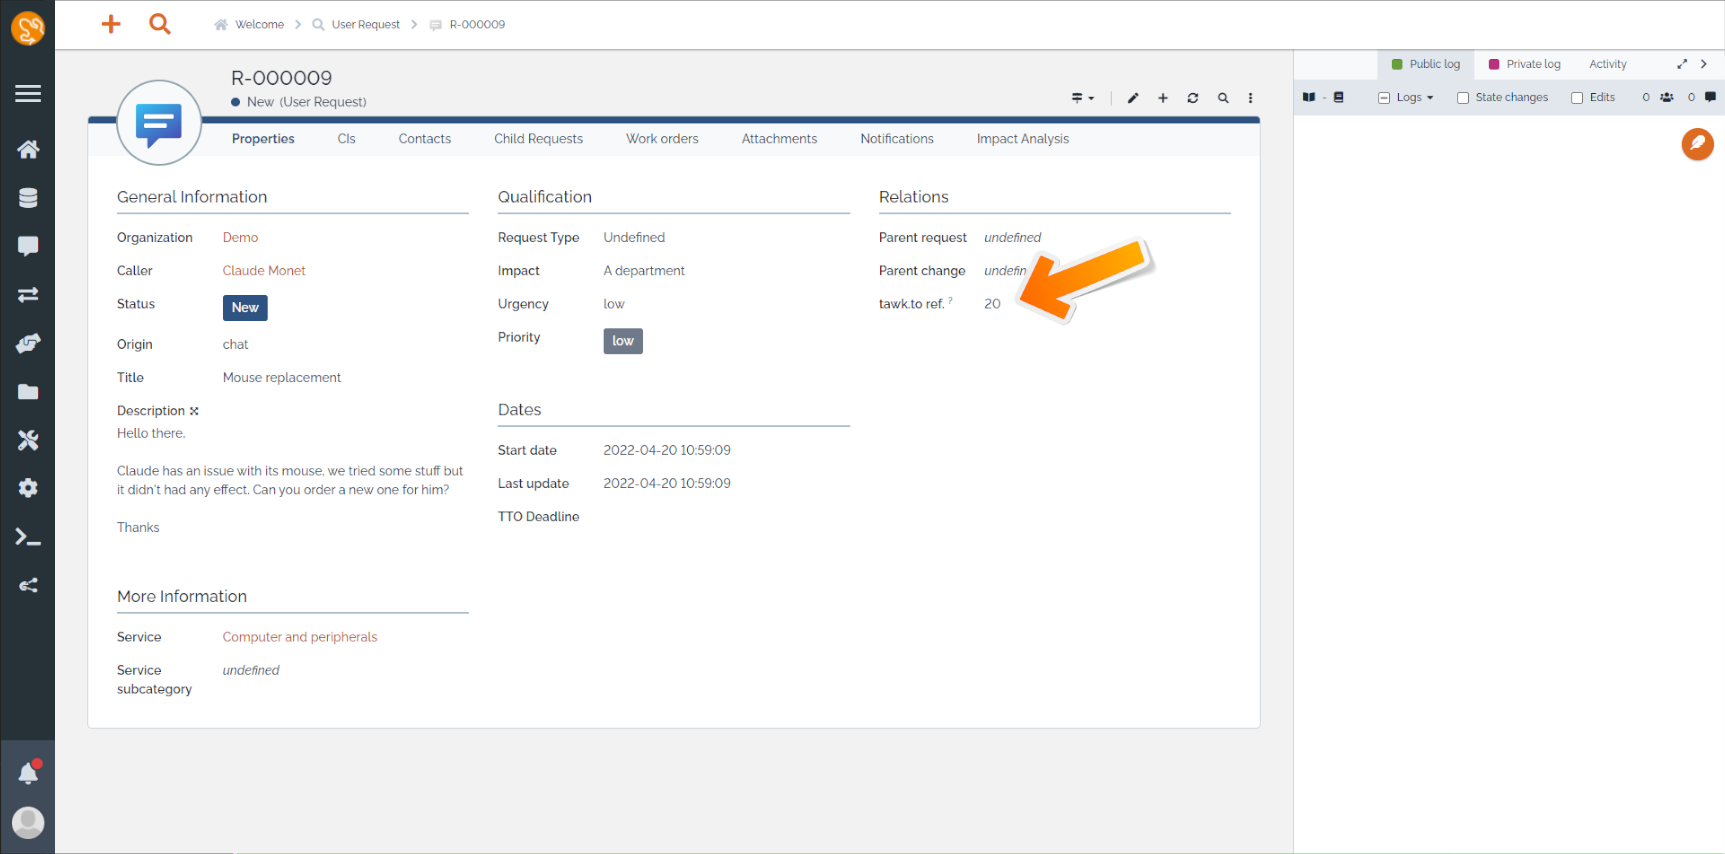
Datamodel changes
If UserRequest class exists in the datamodel, the
extension will:
-
Add new
chatvalue to theoriginattribute. -
Add new
tawkto_refattribute to document the reference of the corresponding ticket in tawk.to. -
Display the
tawkto_refattribute in the “Relations” fieldset of the object properties.