Ticket creation feature (Chat integration with Intercom)
Configuration
Get Intercom account
Note: This step is only necessary once, if you already did it, skip this step.
Go to Intercom, create an account.
Create your own iTop integration within Intercom app store
Note: This step is only necessary if you want support agents to create iTop tickets from their Intercom dashboard. If you just want them to chat with end-users without creating tickets, skip this step.
Steps
-
Prepare iTop access permissions
-
Create new app
-
Retrieve client secret
-
Retrieve access token
-
Configure endpoints URLs
-
Fill module configuration
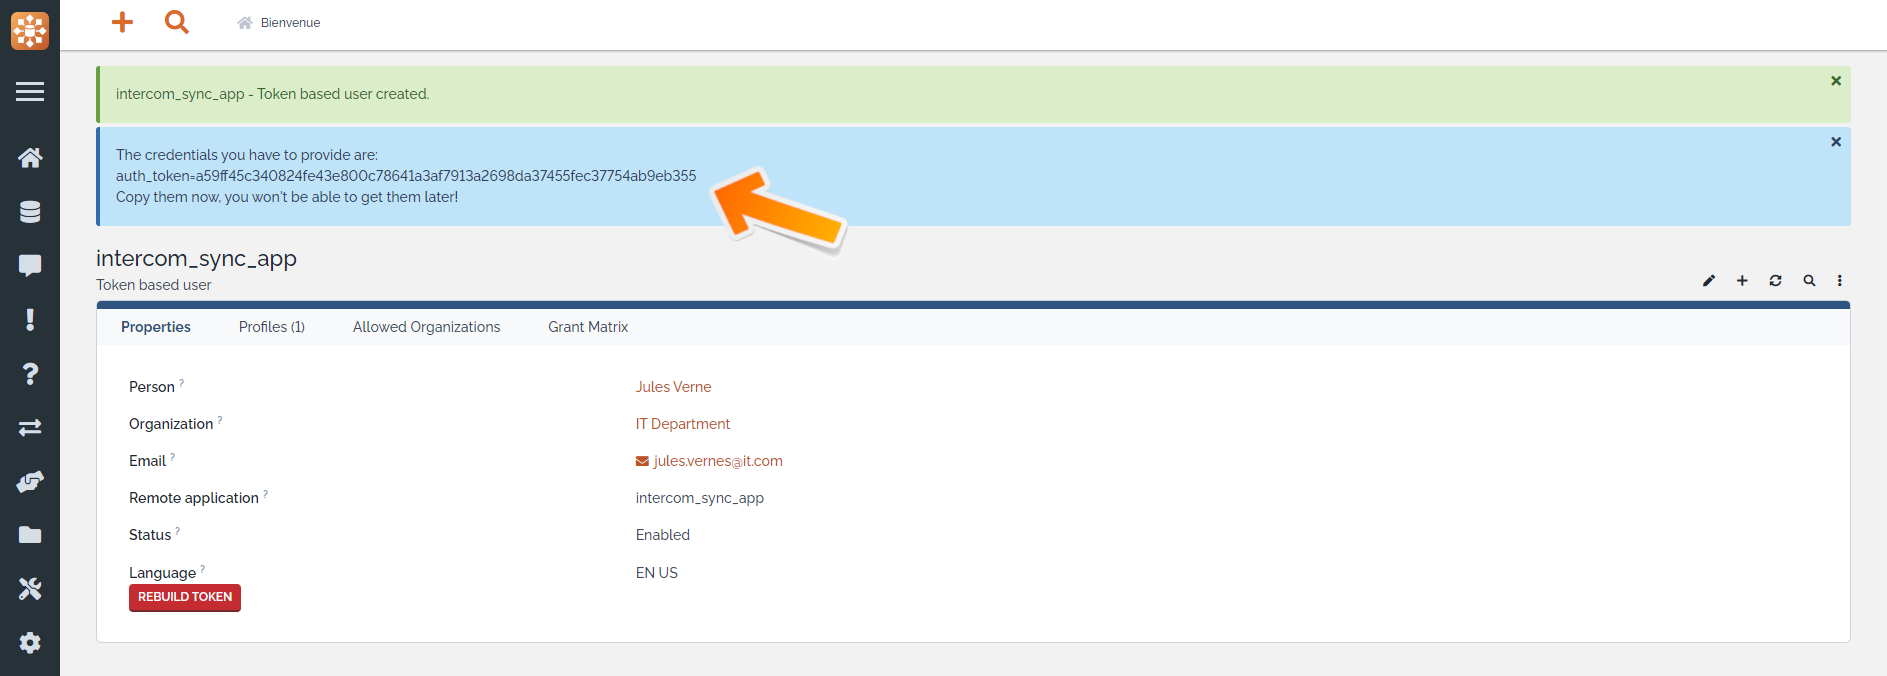
1. Prepare iTop access permissions
[In iTop] First, you need to create a
token-based user in your iTop that will be used by Intercom to
access iTop and manipulate tickets.
-
Create a new
Token based user -
In the
Remote applicationfield, type something that will identify the user as the one being used by the Intercom app, for exampleintercom_sync_app.
(Only alphanumerical, - and _ characters can be used) -
Add it the
Administratorprofile. (This is mandatory for iTop to allow the creation of log entries on behalf of other persons) -
Once created, copy the token displayed on top of the page, it will be used in the following steps and referred to as
ITOP_USER_TOKEN.
In the screenshot below, the token isa59ff45c340[…]eb355, don't copy theauth_token=part.
rest-token as the first
allowed_login_modes in the configuration file.For example:
'allowed_login_types' => 'rest-token|form|external|basic',
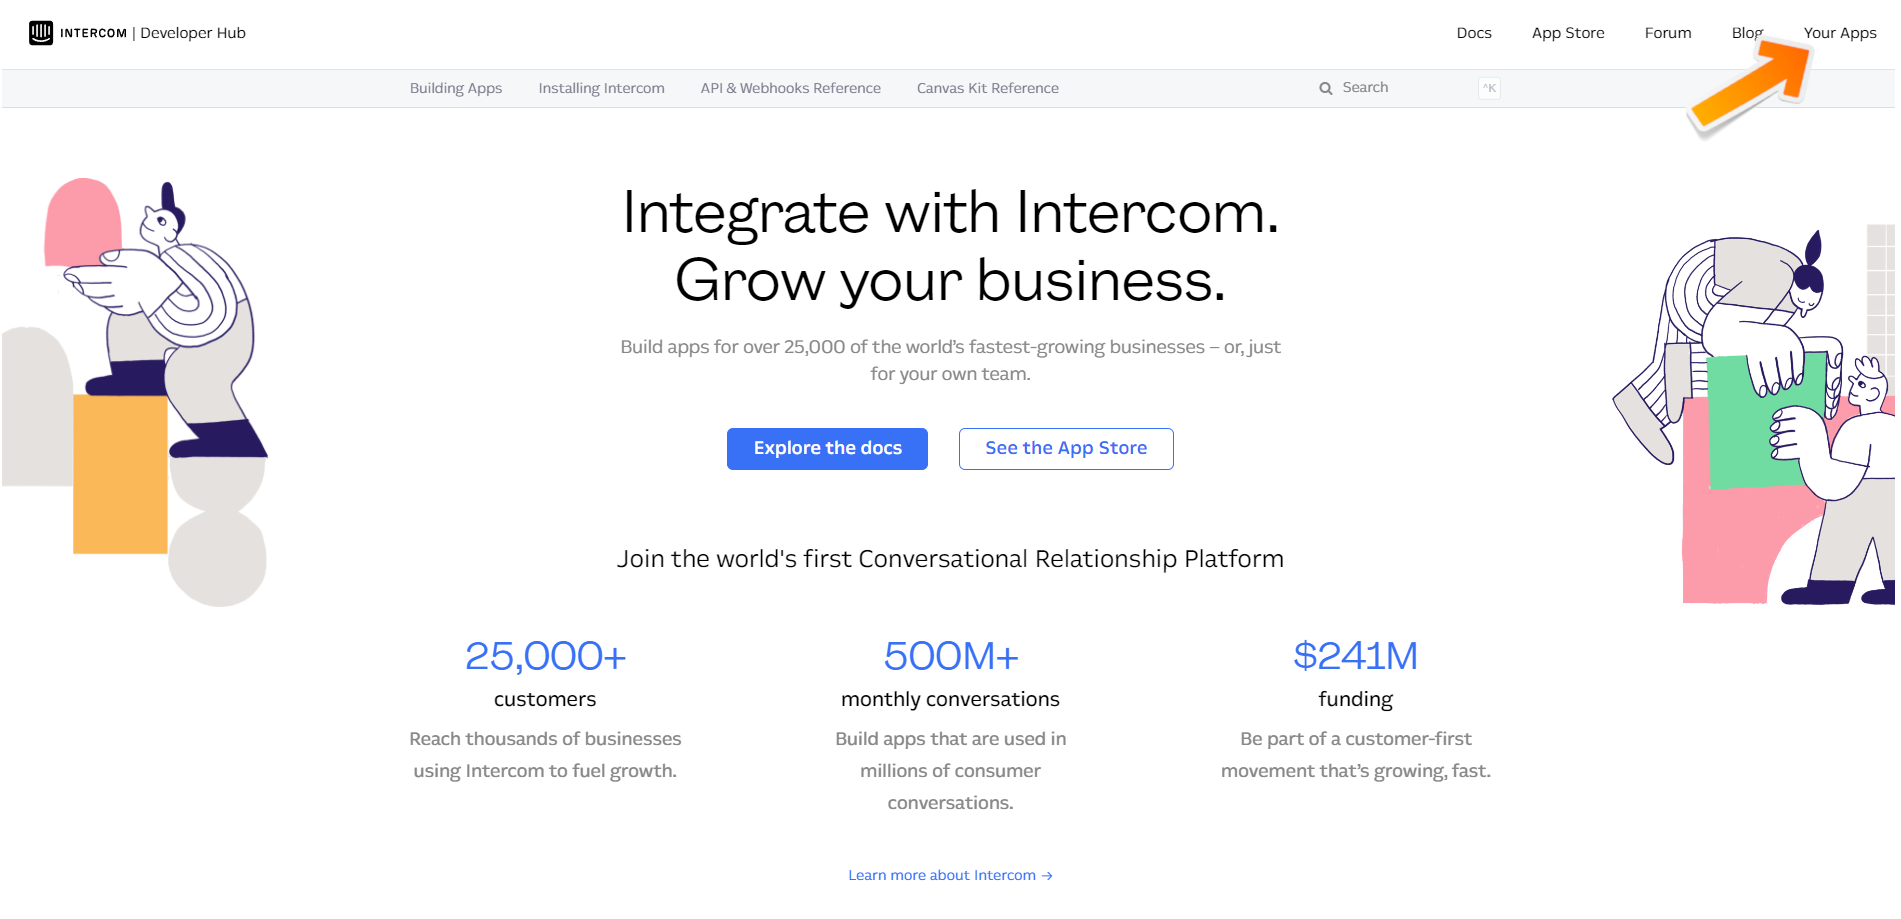
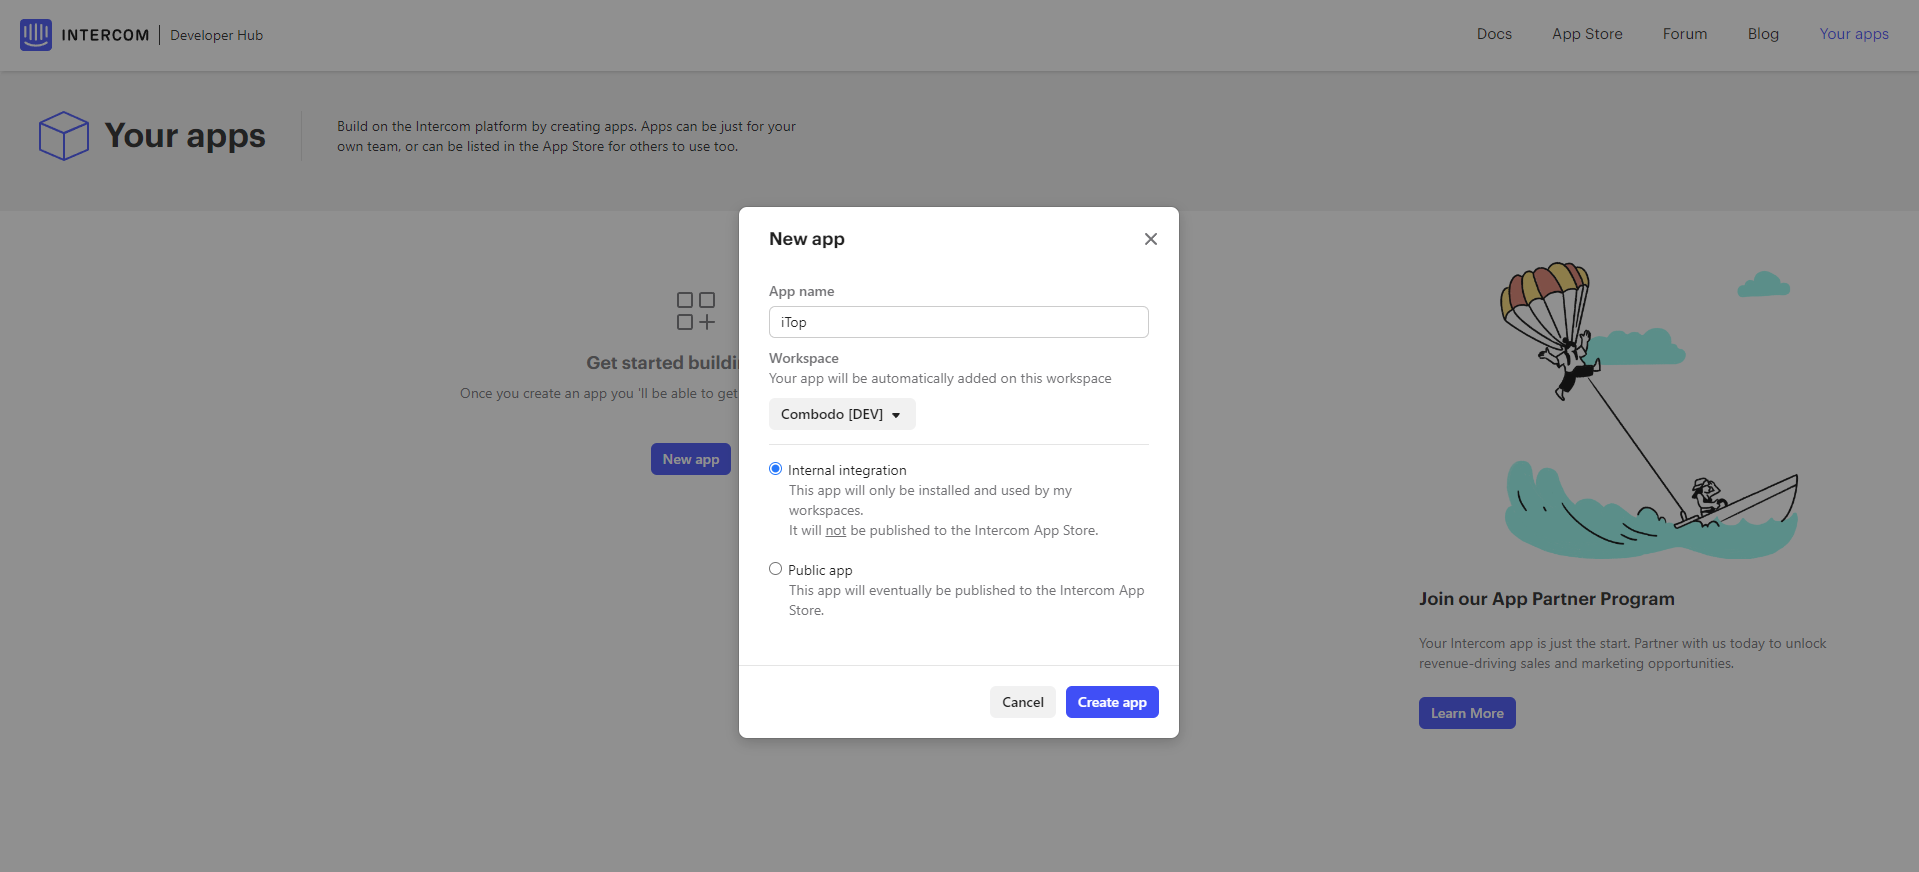
2. Create new app
[In Intercom] Go to the Intercom Developer Hub
[In Intercom] Then go to “Your apps” and create a “new app”. Name it “iTop” and make sure to choose “Internal integration”.
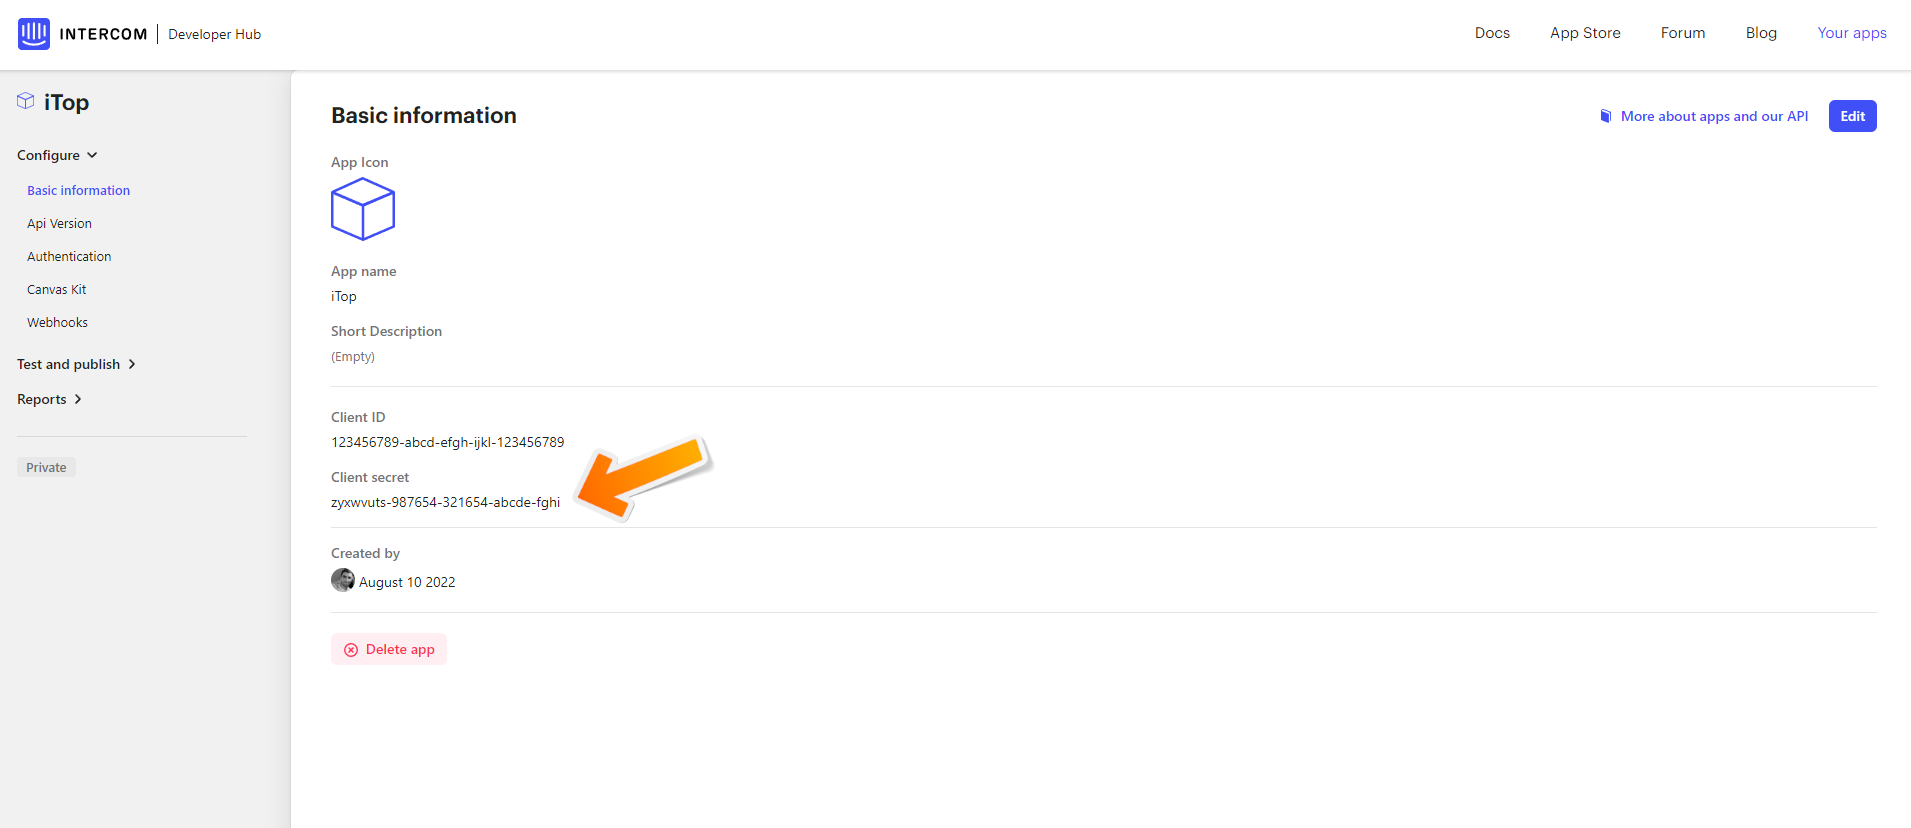
3. Retrieve client secret
[In Intercom]] Now that the app is created you
need to configure it so it can discuss with iTop. Go to the “Basic
information” section and copy the Client secret, will
use it later (eg. “zyxwvuts-987654-321654-abcde-fghi” in the
screenshot below)
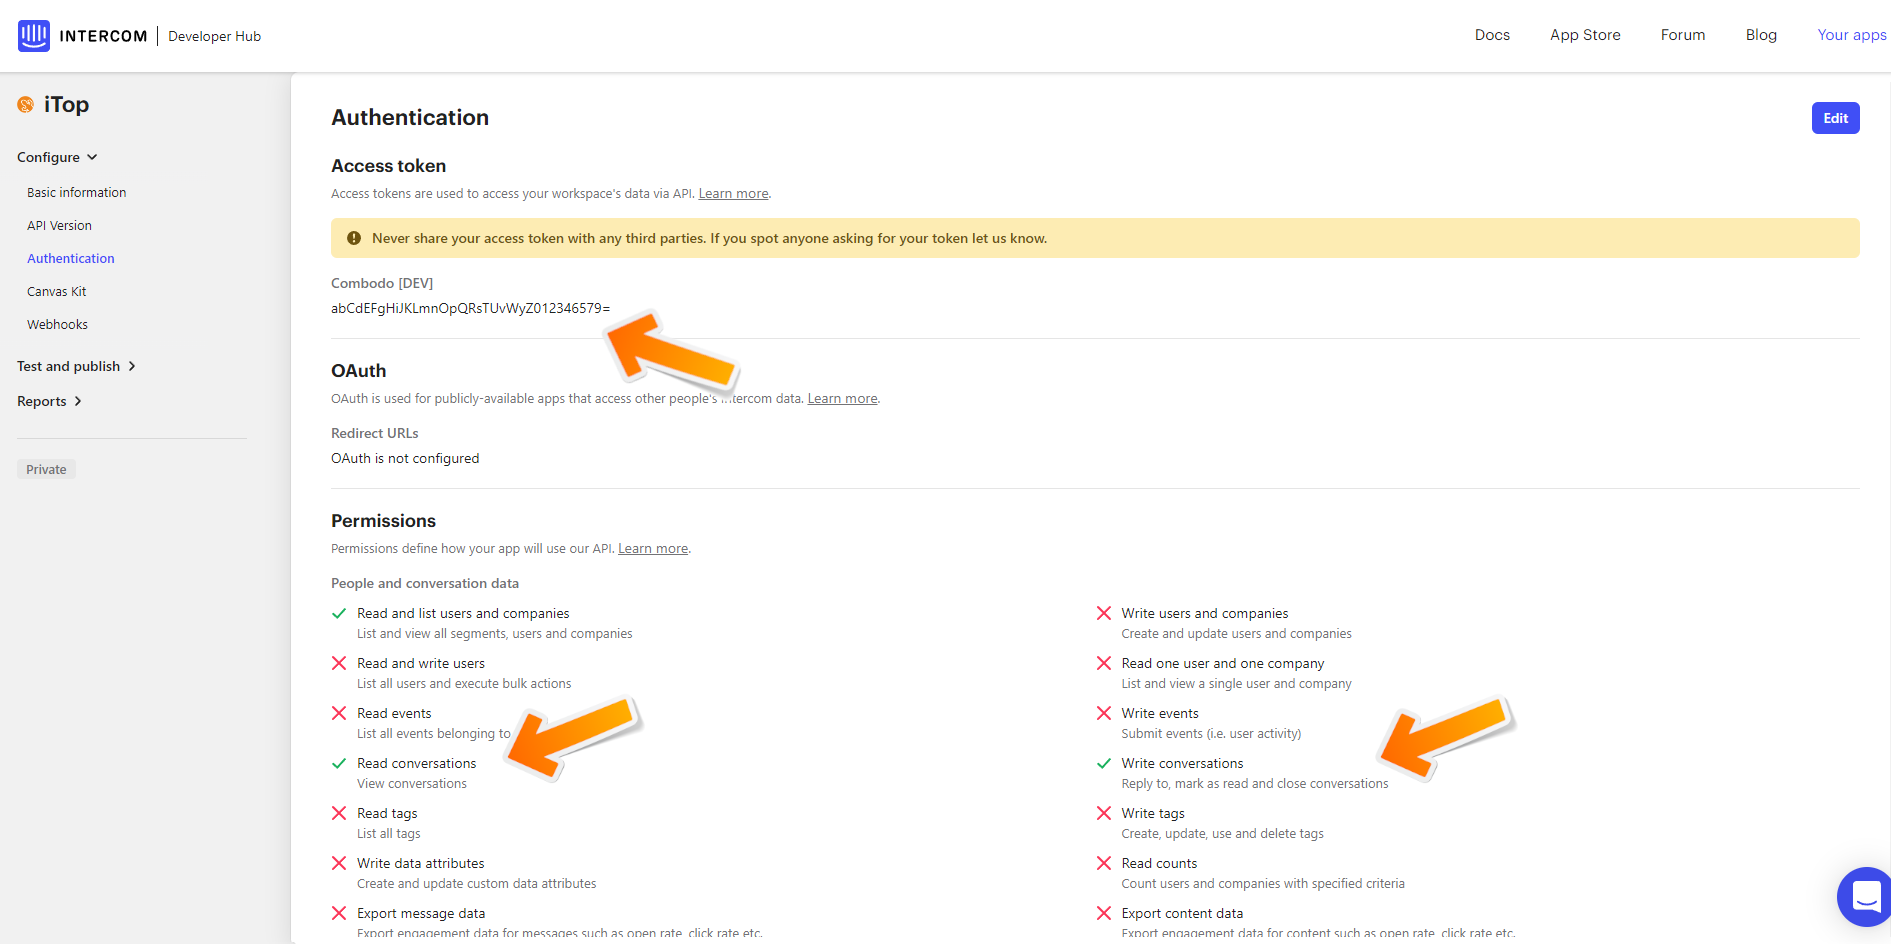
4. Retrieve access token
[In Intercom] Then go to the “Authentication” section
-
Copy the
Access token, will use it later (eg. “abCdEFgHiJKLmnOpQRsTUvWyZ012346579=” in the screenshot below) -
Enable the following permissions and don't forget to save
-
Read conversationsfor obvious reason -
Write conversationsto enable the app to add auto-generated messages in the conversation
-
5. Configure endpoints URLs
[In Intercom] Now to the “Canvas Kit” section.
-
Open the “For teammates”
-
Check “Inbox” which is the support agents GUI
-
Fill the following parameters but mind to change
ITOP_APP_ROOT_URLandITOP_USER_TOKENwith your own iTop app root URL and token-
Initialize flow webhook URL
ITOP_APP_ROOT_URL/pages/exec.php?exec_module=combodo-intercom-integration&exec_page=incoming-canvas-kits.php&operation=initialize-conversation-details&auth_token=ITOP_USER_TOKEN -
Submit flow webhook URL
ITOP_APP_ROOT_URL/pages/exec.php?exec_module=combodo-intercom-integration&exec_page=incoming-canvas-kits.php&operation=submit-conversation-details&auth_token=ITOP_USER_TOKEN
-

[In Intercom] Now to the “Webhooks” section.
-
Fill the request endpoint URL parameter but mind to change
ITOP_APP_ROOT_URLandITOP_USER_TOKENwith your own iTop app root URL and token
ITOP_APP_ROOT_URL/pages/exec.php?exec_module=combodo-intercom-integration&exec_page=incoming-webhooks.php&auth_token=ITOP_USER_TOKEN -
Enable the following “Webhook topics”
-
conversation.admin.replied -
conversation.admin.noted -
conversation.user.replied
-

6. Fill module configuration
[In iTop] Now that the app is created, you have to configure iTop so it allows it to interact with it. In the iTop configuration file, fill the module settings as follow, using one of the methods described below:
-
workspacesAn array of Intercom workspaces and their options. Having multiple workspaces is only necessary is you want different Intercom teams to answer to specific user subsets.
Keys of the array must be the Intercom workspace IDs, values must be an array of the following parameters:-
scopeAn OQL query to define which iTop users will have access to the chat widget.
-
-
sync_app.client_secretIntercom app client secret retrieved earlier -
sync_app.access_tokenIntercom app access token retrieved earlier
There are 2 ways to configure the module settings:
-
Through the iTop configuration file: Will only
-
Through the XML datamodel via the ITSM Designer or an extension
Method 1: Configuration through the iTop configuration file
Pros:
-
Can be done easily as you just need to edit the configuration in your iTop instance
Cons:
-
Only applies to that particular iTop instance. If you are running several iTop frontals or environments, you will need to duplicate the configuration on each instances you want the chat to be enabled.
Simply put the following in the configuration file and fill it with your own settings:
'combodo-intercom-integration' => array (
        'workspaces' => array (
          'PUT_YOUR_WORKSPACE_ID_HERE' => array ( // Replace "PUT_YOUR_WORKSPACE_ID_HERE" with the workspace ID retrieve in the previous step ("abcdefg" in the example)
            'scope' => 'SELECT Organization',
          ),
        ),
        'sync_app.client_secret' => 'PUT_YOUR_APP_CLIENT_SECRET_HERE',
        'sync_app.access_token' => 'PUT_YOUR_APP_ACCESS_TOKEN_HERE',
),
Method 2: Configuration through the XML datamodel
Pros:
-
Configuration will apply to all instances using this datamodel:
-
If done in the ITSM Designer: All instances of the concerned license
-
If done in an extension: All instances using the extension
-
-
Can still be overloaded locally with method #1
Cons:
-
When using the ITSM Designer: Need Combodo's assistance to configure the module parameters
-
When using an extension: Need to be familiar with iTop extension development
Use the following XML as a bootstrap:
<?xml version="1.0" encoding="UTF-8"?>
<itop_design xmlns:xsi="http://www.w3.org/2001/XMLSchema-instance" version="1.7">
        <module_parameters>
                <parameters id="combodo-intercom-integration" _delta="define">
                        <!-- Replace "PUT_YOUR_WORKSPACE_ID_HERE" with the workspace ID retrieve in the previous step ("abcdefg" in the example) -->
                                <PUT_YOUR_WORKSPACE_ID_HERE type="hash">
                                        <scope><![CDATA[SELECT Organization]]></scope>
                                </PUT_YOUR_WORKSPACE_ID_HERE>
                        <!-- Used to authenticate incoming requests -->
                        <sync_app.client_secret>PUT_YOUR_APP_CLIENT_SECRET_HERE</sync_app.client_secret>
                        <!-- Used to authenticate outgoing requests -->
                        <sync_app.access_token>PUT_YOUR_APP_ACCESS_TOKEN_HERE</sync_app.access_token>
                </parameters>
        </module_parameters>
</itop_design>