Live chat widget feature (Chat integration with Intercom)
Configuration
Get Intercom account
Note: This step is only necessary once, if you already did it, skip this step.
Go to Intercom, create an account.
Configure live chat widget in iTop
Note: This step is only necessary if you want the live chat widget to be visible in iTop. If your live chat widget is on another website (eg. online store, corporate website, …) and only want to create tickets in iTop from the chat dashboard, skip this step.
Steps
-
Retrieve workspace ID
-
Enable user traffic in the Messenger's configuration
-
Fill module configuration
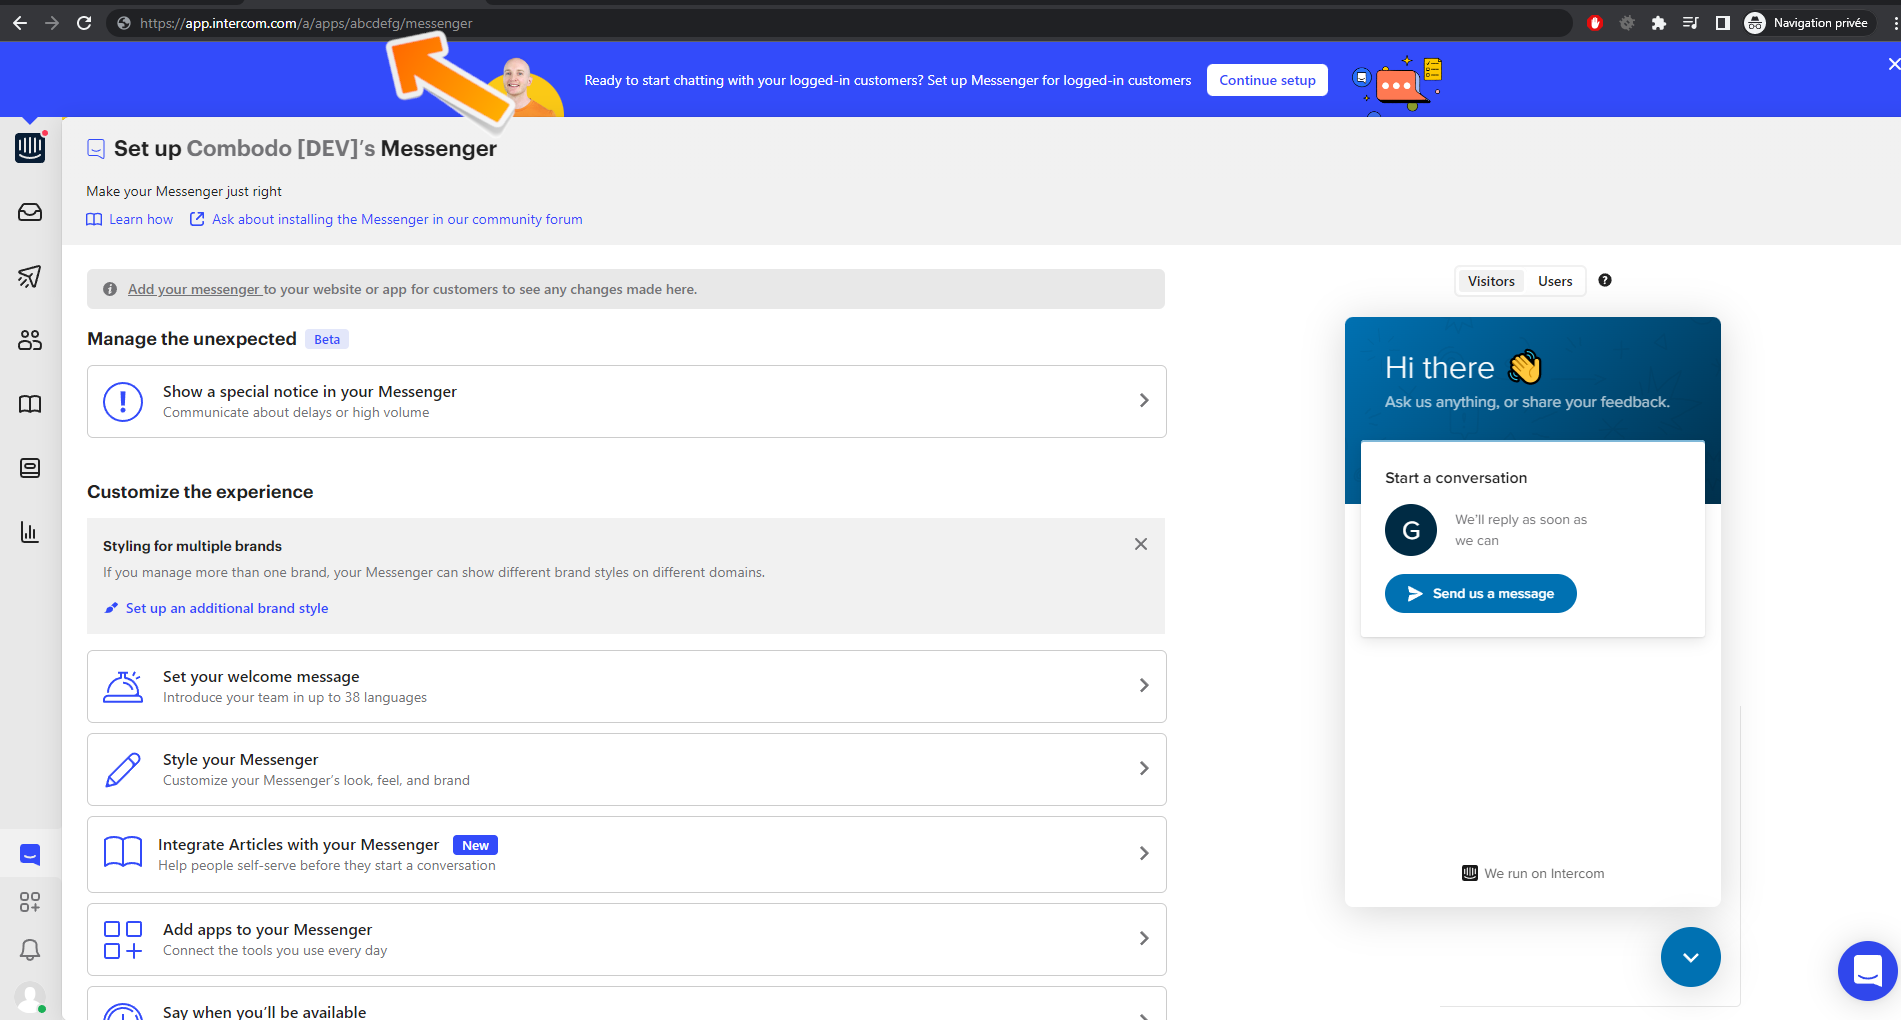
1. Retrieve workspace ID
[In Intercom] First, go to the Intercom
backoffice, on the “Messenger” page, then retrieve in the browser
URL bar the
Workspace ID (“abcdefg” in the screenshot below) we
will use it later.
2. Enable user traffic
[In Intercom] Then, open the “Messenger”'s
configuration, go to the “install” tab and enable User
traffic.
If you don't, the Messenger might not display in iTop.

3. Fill module configuration
[In iTop] Once you got it, open your iTop and fill the module settings as using one of the methods described below:
-
workspacesAn array of Intercom workspaces and their options.
Keys of the array must be the Intercom workspace IDs, values must be an array of the following parameters:-
scopeAn OQL query to define which iTop users will have access to the chat widget.
-
Mind that when having multiple workspaces, only the first workspace with a matching scope will be used for the connected user.
There are 2 ways to configure the module settings:
-
Through the iTop configuration file: Will only
-
Through the XML datamodel via the ITSM Designer or an extension
Method 1: Configuration through the iTop configuration file
Pros:
-
Can be done easily as you just need to edit the configuration in your iTop instance
Cons:
-
Only applies to that particular iTop instance. If you are running several iTop frontals or environments, you will need to duplicate the configuration on each instances you want the chat to be enabled.
Simply put the following in the configuration file and fill it with your own settings:
'combodo-intercom-integration' => array (
        'workspaces' => array (
          'PUT_YOUR_WORKSPACE_ID_HERE' => array ( // Replace "PUT_YOUR_WORKSPACE_ID_HERE" with the workspace ID retrieve in the previous step ("abcdefg" in the example)
            'scope' => 'SELECT Organization',
          ),
        ),
),
Method 2: Configuration through the XML datamodel
Pros:
-
Configuration will apply to all instances using this datamodel:
-
If done in the ITSM Designer: All instances of the concerned license
-
If done in an extension: All instances using the extension
-
-
Can still be overloaded locally with method #1
Cons:
-
When using the ITSM Designer: Need Combodo's assistance to configure the module parameters
-
When using an extension: Need to be familiar with iTop extension development
Use the following XML as a bootstrap:
<?xml version="1.0" encoding="UTF-8"?>
<itop_design xmlns:xsi="http://www.w3.org/2001/XMLSchema-instance" version="1.7">
        <module_parameters>
                <parameters id="combodo-intercom-integration" _delta="define">
                        <workspaces type="hash">
                                <!-- Replace "PUT_YOUR_WORKSPACE_ID_HERE" with the workspace ID retrieve in the previous step ("abcdefg" in the example) -->
                                <PUT_YOUR_WORKSPACE_ID_HERE type="hash">
                                        <scope><![CDATA[SELECT Organization]]></scope>
                                </PUT_YOUR_WORKSPACE_ID_HERE>
                        </workspaces>
                </parameters>
        </module_parameters>
</itop_design>